Windows中配置PigGo图床及CDN加速

本文最后更新于:2025年7月13日 下午

1、下载安装PicGo

PiGo官方仓库网站:

https://github.com/Molunerfinn/PicGo/releases

进入仓库后选择下面的安装包

image-20231015233244099

下载好了之后,双击程序,按照向导安装完成即可。

2、配置github作为图床源

Pigo仅仅作为一个图片中转的工具,不提供图床的服务,需要结合其他图床平台来协同使用,这里以github作为图床来配置。

2.1、新建github仓库

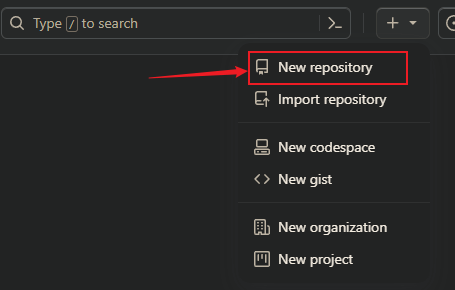
新建仓库:

image-20231017001554597

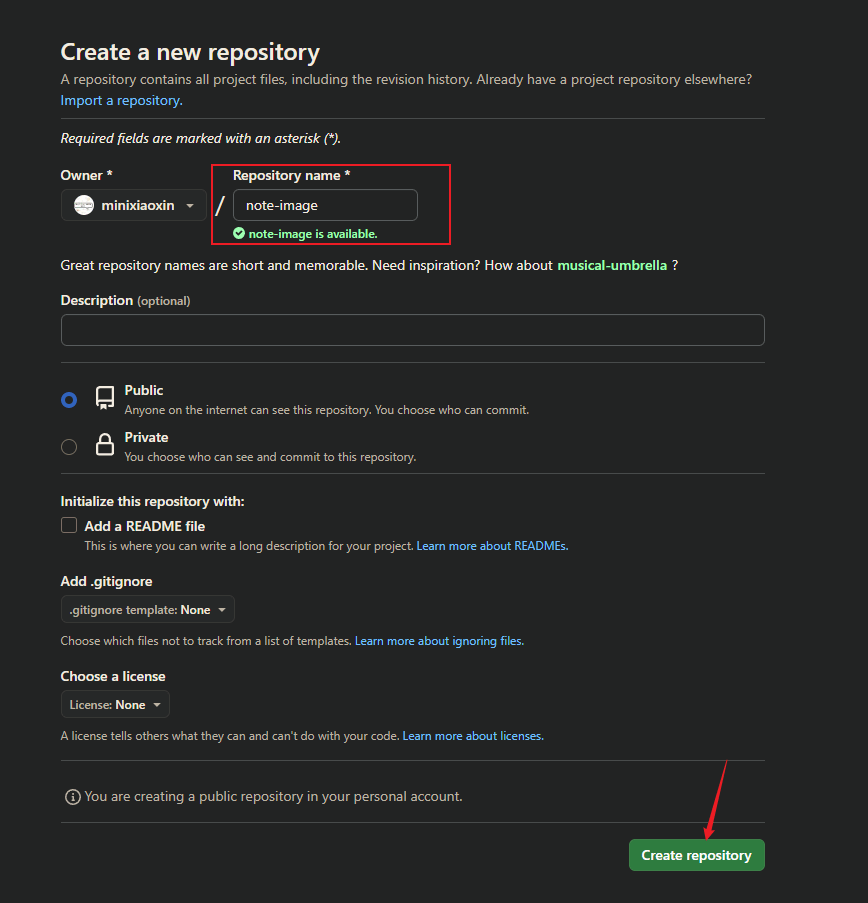
修改仓库名称并提交:

image-20231017001655037

之后再上传一个新的文件或创建一个新的文件即可完成创建过程。避免数据公开产生问题,可以选择创建为Private私有库。

2.2、生成github token

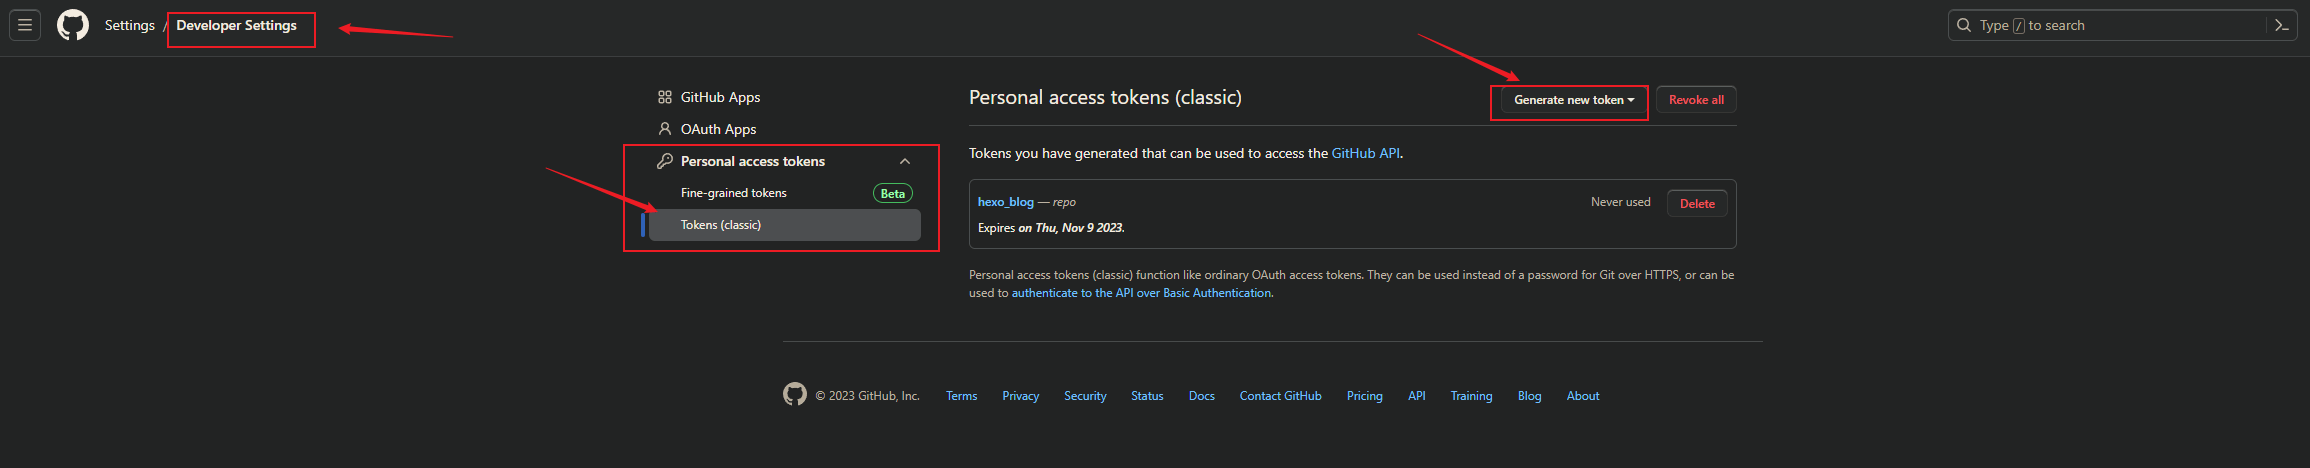
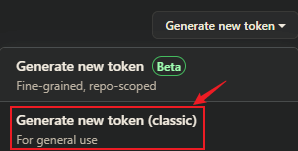
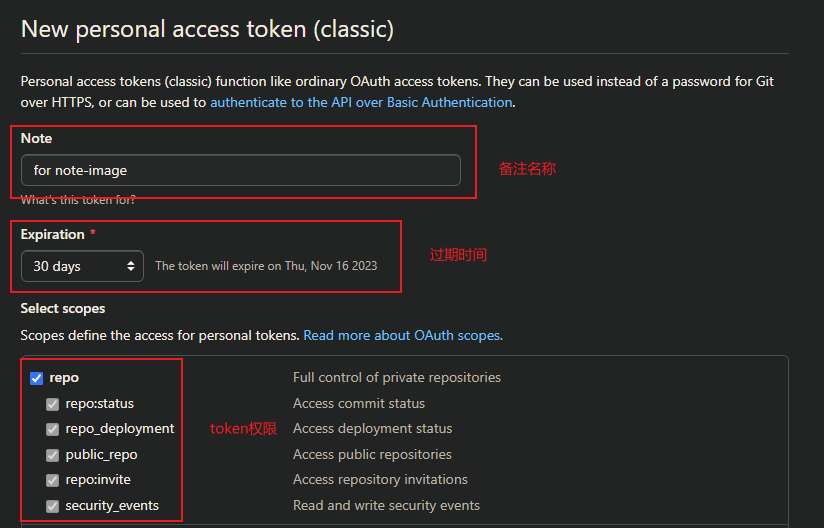
生成一个github token,方便我们使用PicGo来连接到github:

image-20231017002156021

image-20231017002426939

  • 2、配置token信息:token名称、过期时间、权限

image-20231017002614537

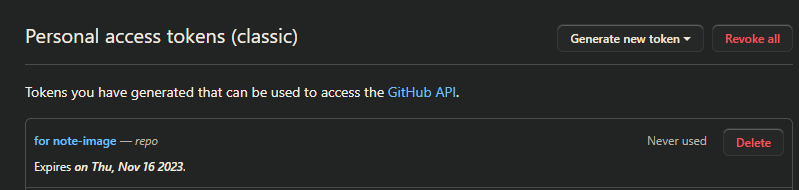
  • 3、下拉到页面底部点击Generator token,生成token:生成完成,页面如下
    image-20231017003026824

注: token生成之后只显示1次,关闭页面后不再显示,及时保存防止遗忘。

2.3、PigGo配置github图床

配置步骤如下:

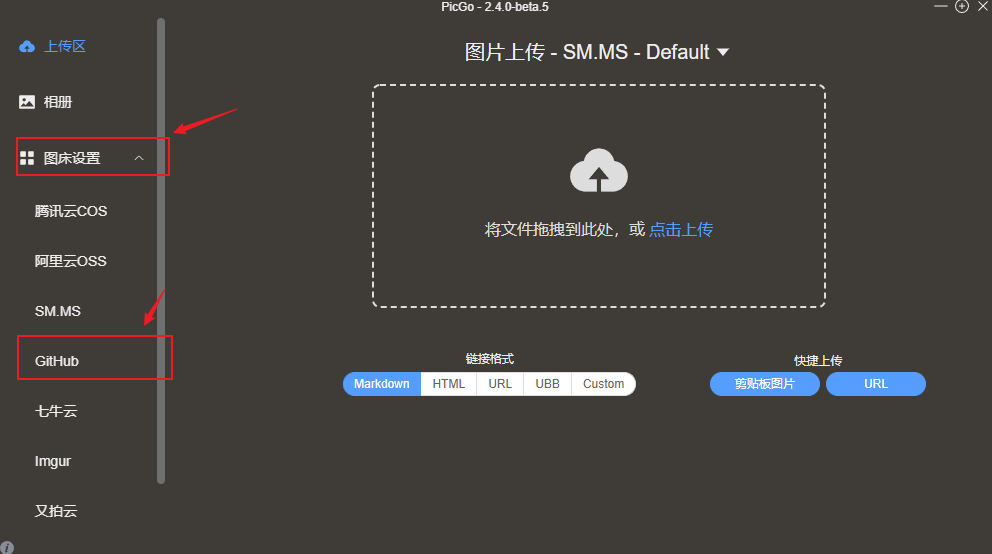
  • 1、打开PicGo,进入 “图床设置 -> GitHub”:

image-20231017003234325

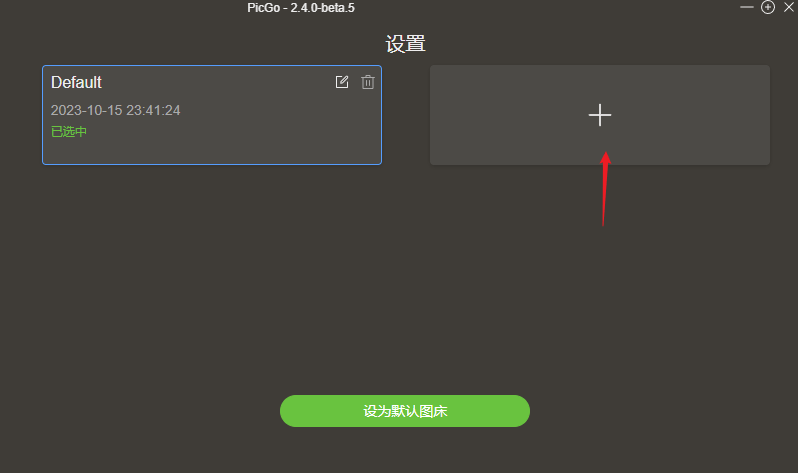
  • 2、点击+添加图床配置:

image-20231017003309793

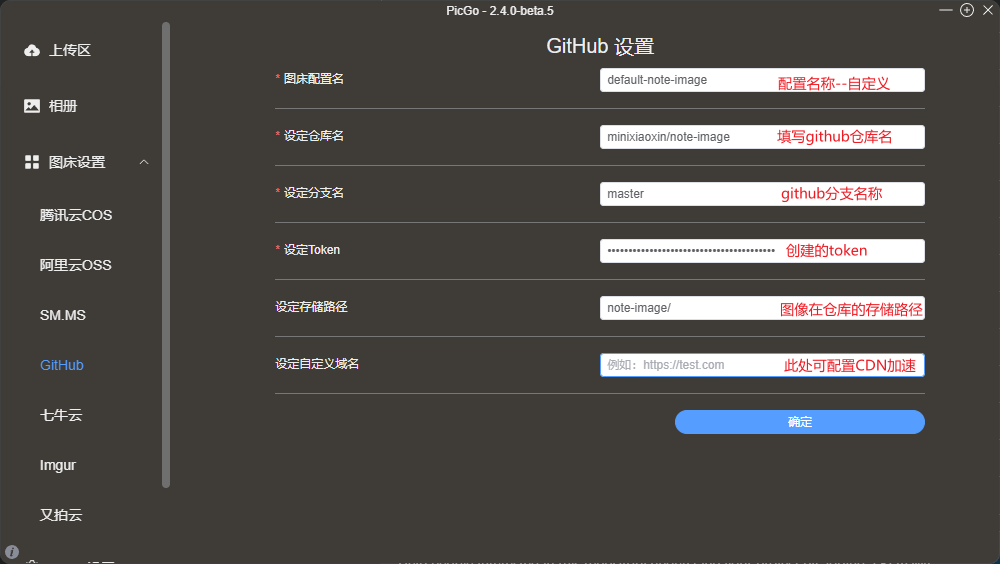
image-20231017004203604

​ 配置完成后,点击确定,之后会自动替换掉原来的Default设置,将Github设为默认图床。

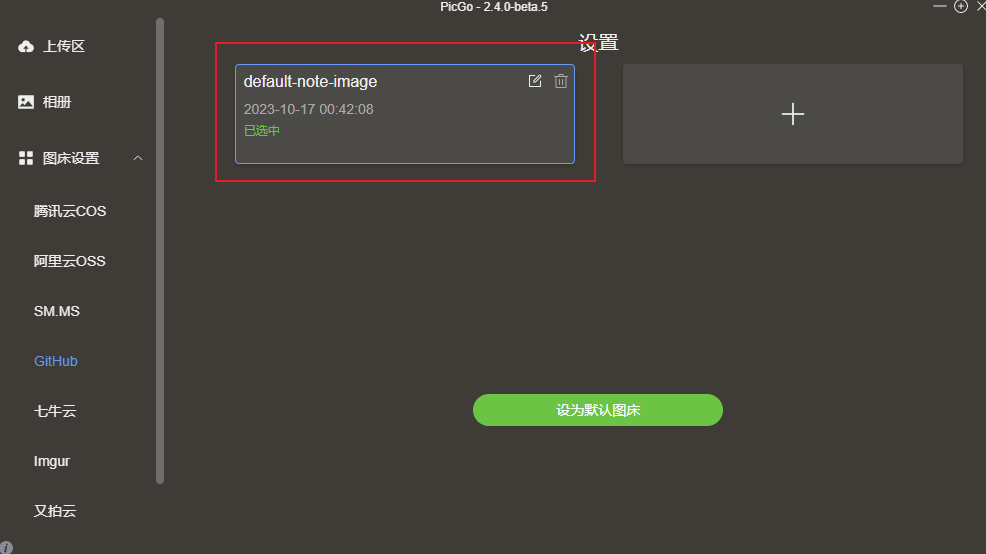
  • 4、配置检查:原先的Default配置被替换

image-20231017012013201

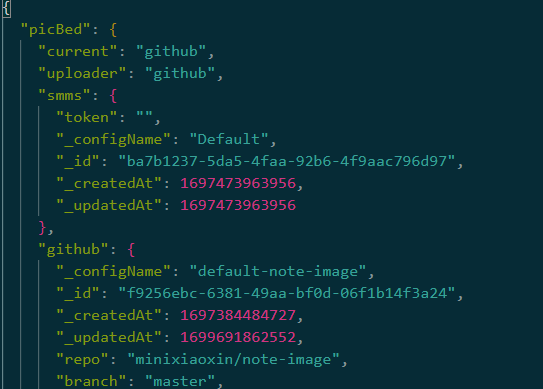
在配置文件中,也可以查询到相应的配置存在更新:

image-20250713142131456

默认的PicGo配置文件路径如下:

  • Windows: %APPDATA%\picgo\data.json
  • Linux: $XDG_CONFIG_HOME/picgo/data.json or ~/.config/picgo/data.json
  • macOS: ~/Library/Application\ Support/picgo/data.json

2.4、上传图片方式

在PicGo中:

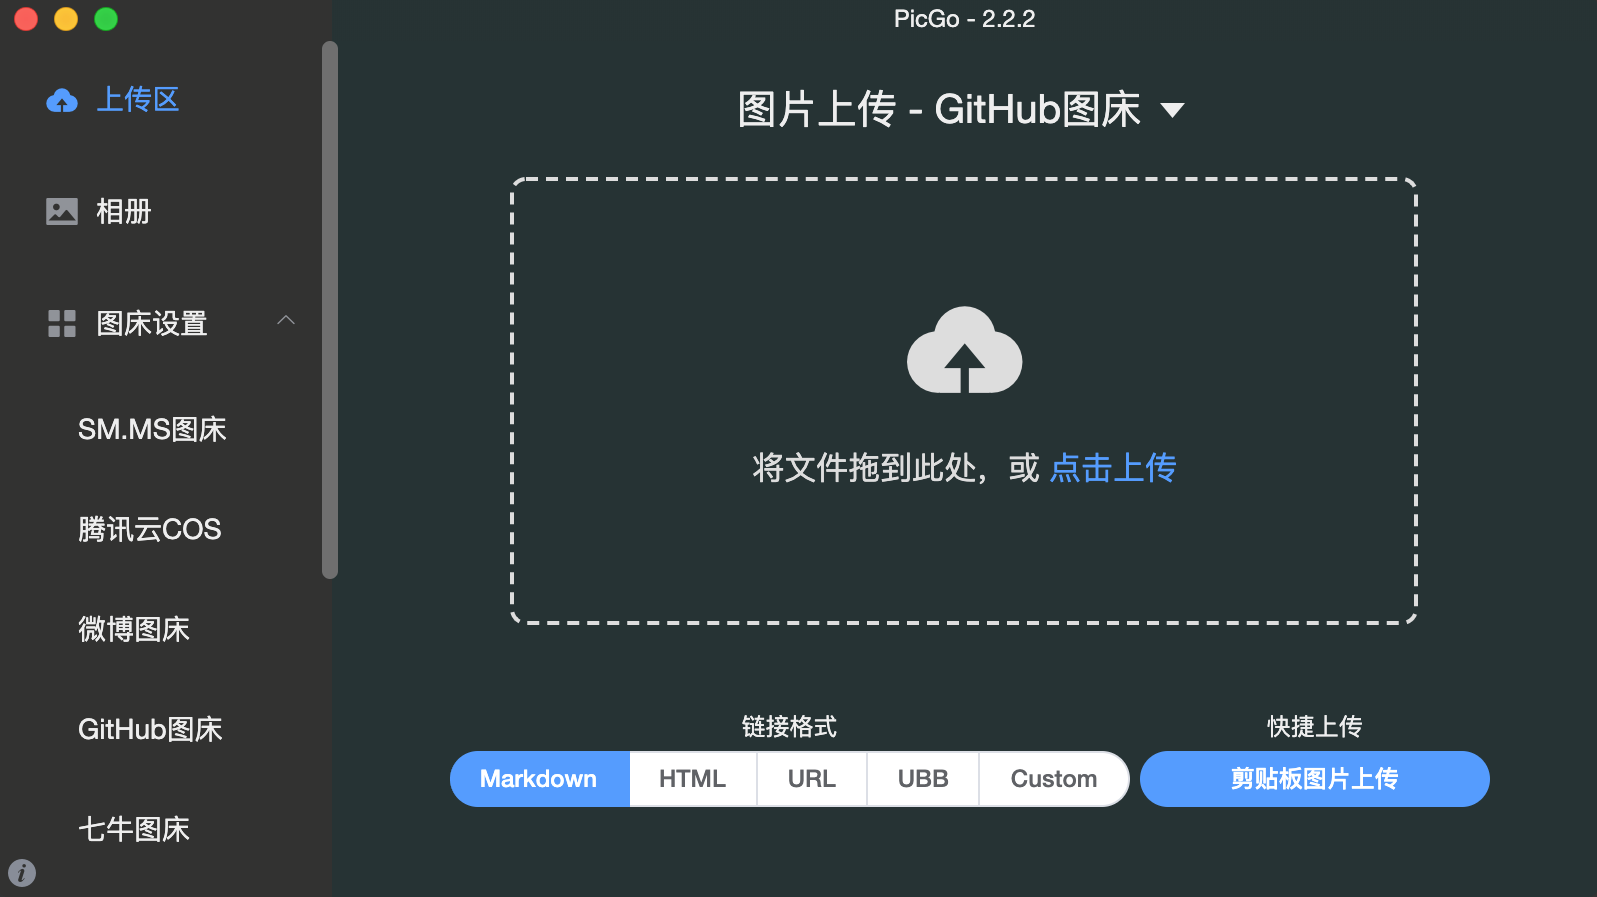
  • 上传区支持三种上传方式:

    1、MacOS中支持menubar图标拖拽上传

    2、主窗口拖拽或“点击上传”选择图片文件上传

    3、剪贴板图片上传,支持自定义快捷键

    Tips: 前两种都是可以明确获得文件名,而第三种无法获取文件名(当剪贴板是临时截图时是不存在文件名的)

image-20231017011613032

图片的链接格式,默认为markdown,也推荐使用markdown格式,必要时修改。

  • 相册区 :

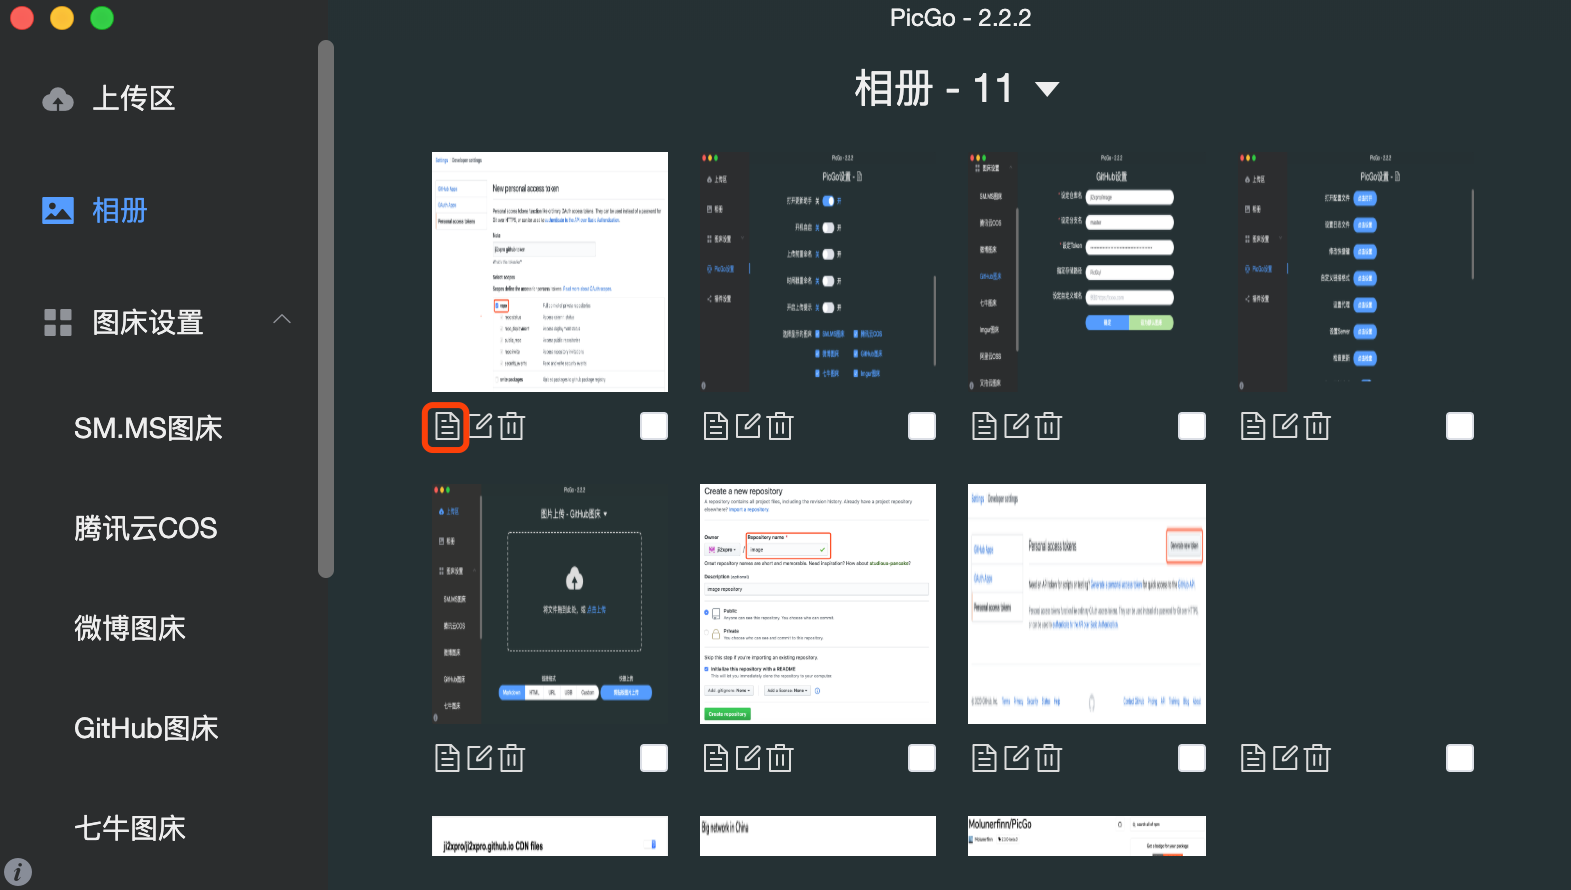
    上传完成的图片在相册区能够查看到,同时在Github源仓库中也能够查看到对应的文件,下面图标为复制图片链接:

image-20231017012741810

在markdown文档中,复制的链接格式可以直接使用,其他格式需要做相应转换。

注意: 针对gif动图的上传,需要对源文件进行上传,不能直接复制,不然上传时会截取其中1帧上传。

3、Typora中使用PicGo

Typora是一热门的markdown文本编辑器,在其中如何使用PicGo步骤如下:

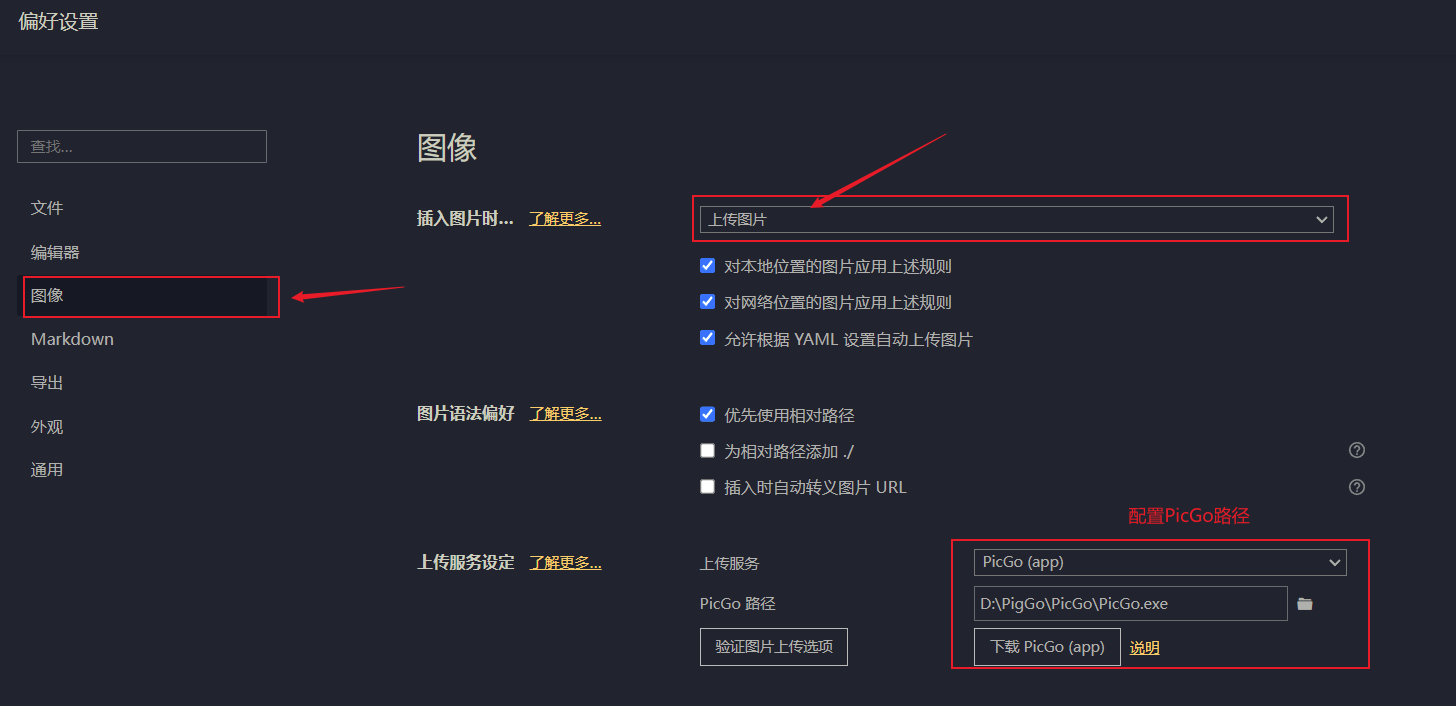
  • 1、偏好设置修改图像上传方式

    • 修改“插入图片时…”配置为上传图片;
    • “上传服务设定”中配置上传服务为PicGo(app),同时将前文安装的PicGo路径填入,配置如下图:

    image-20231017012329318

4、添加CDN加速

考虑到图片上传到github服务器,国内访问,图片会加载缓慢或者加载失败。选择添加**CDN(内容分发网络)**来加速图片加载,我选择的是相对稳定、强大并且免费的CloudFlare,缺点是在国内有时候部分图片的加载会受影响(实际使用2年多,失败的情况很少),下面时配置的过程:

4.1、注册CloudFlare

在官网注册账号:https://www.cloudflare.com/zh-cn/

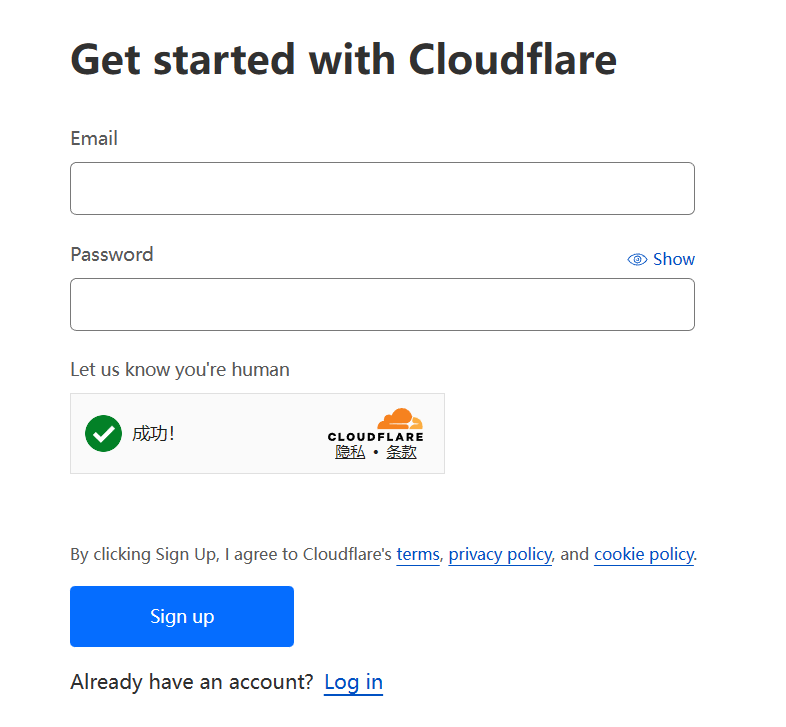
填写账号和密码进行注册:

image-20231022173602884

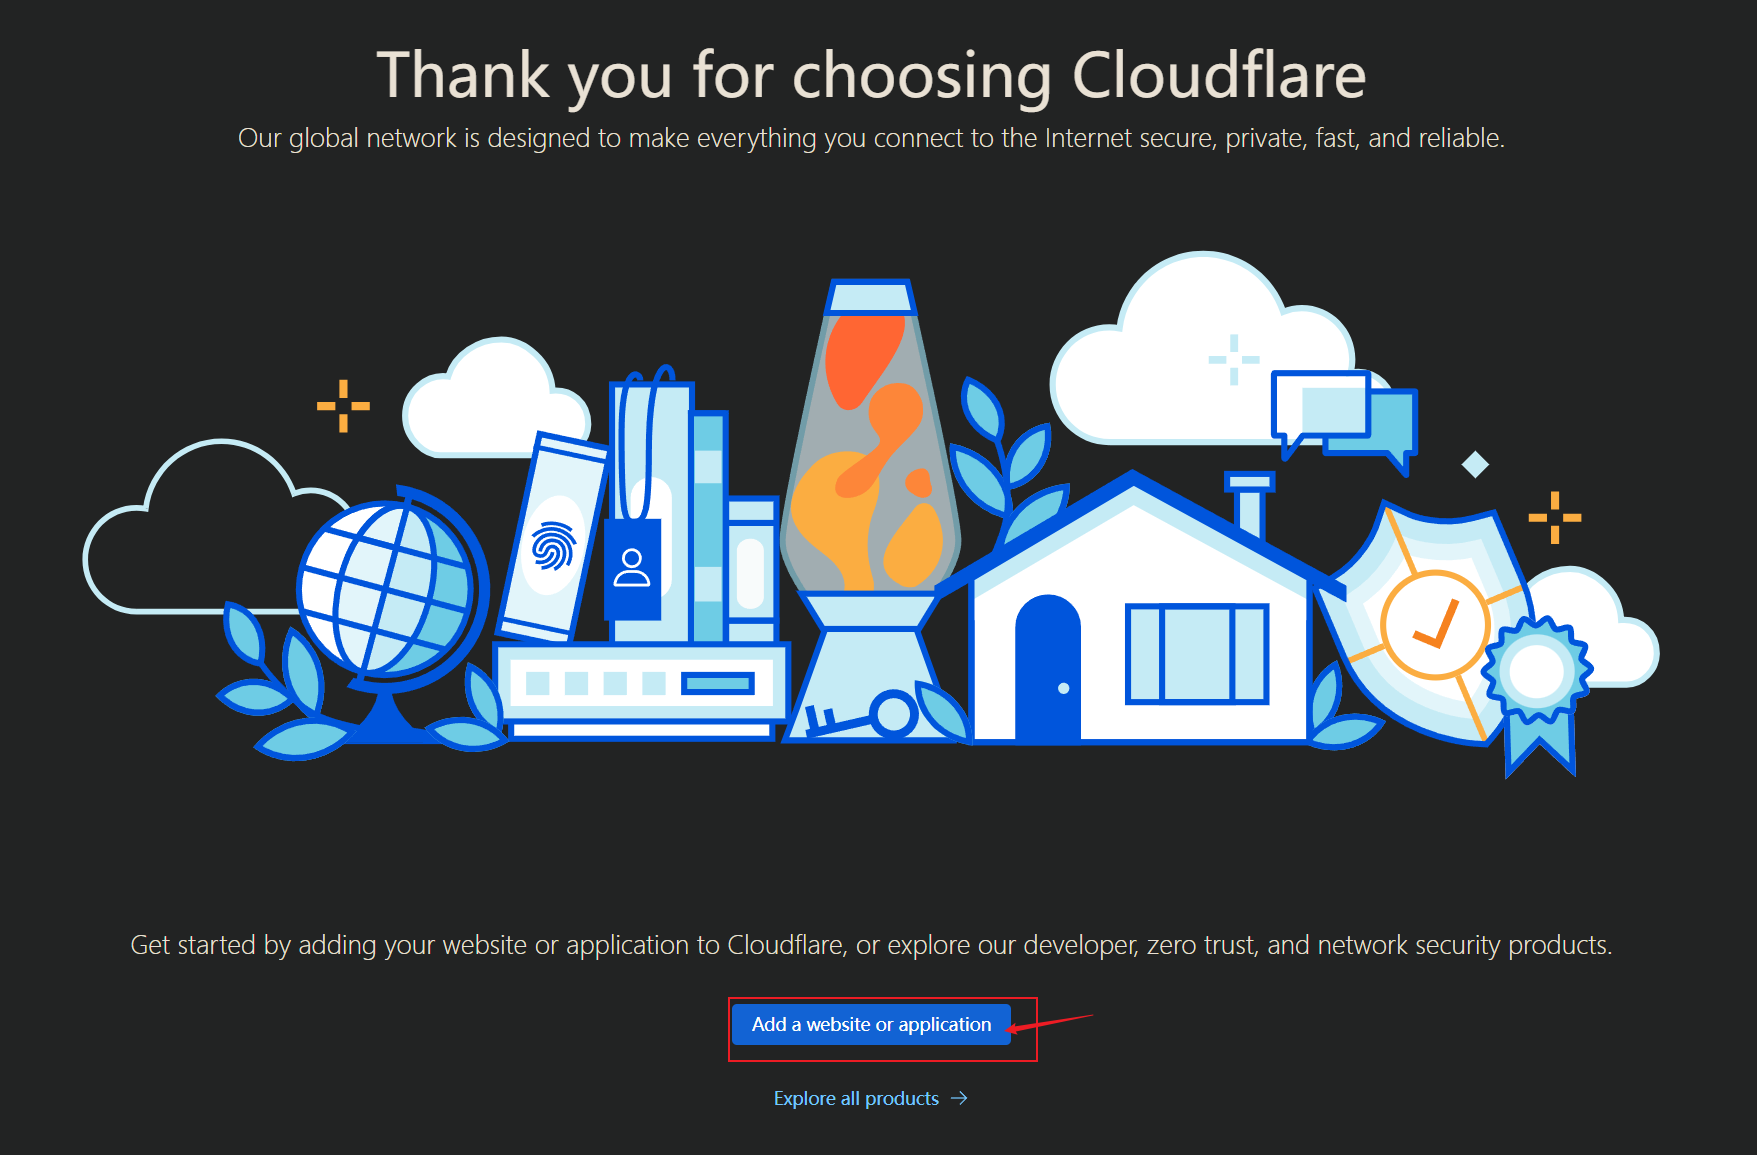
注册成功之后,选择此项:

image-20231022173448833

会跳转到控制台或直接使用链接进入:https://dash.cloudflare.com/c67897f1b5c89973376a8ed2c85d43f7/add-site

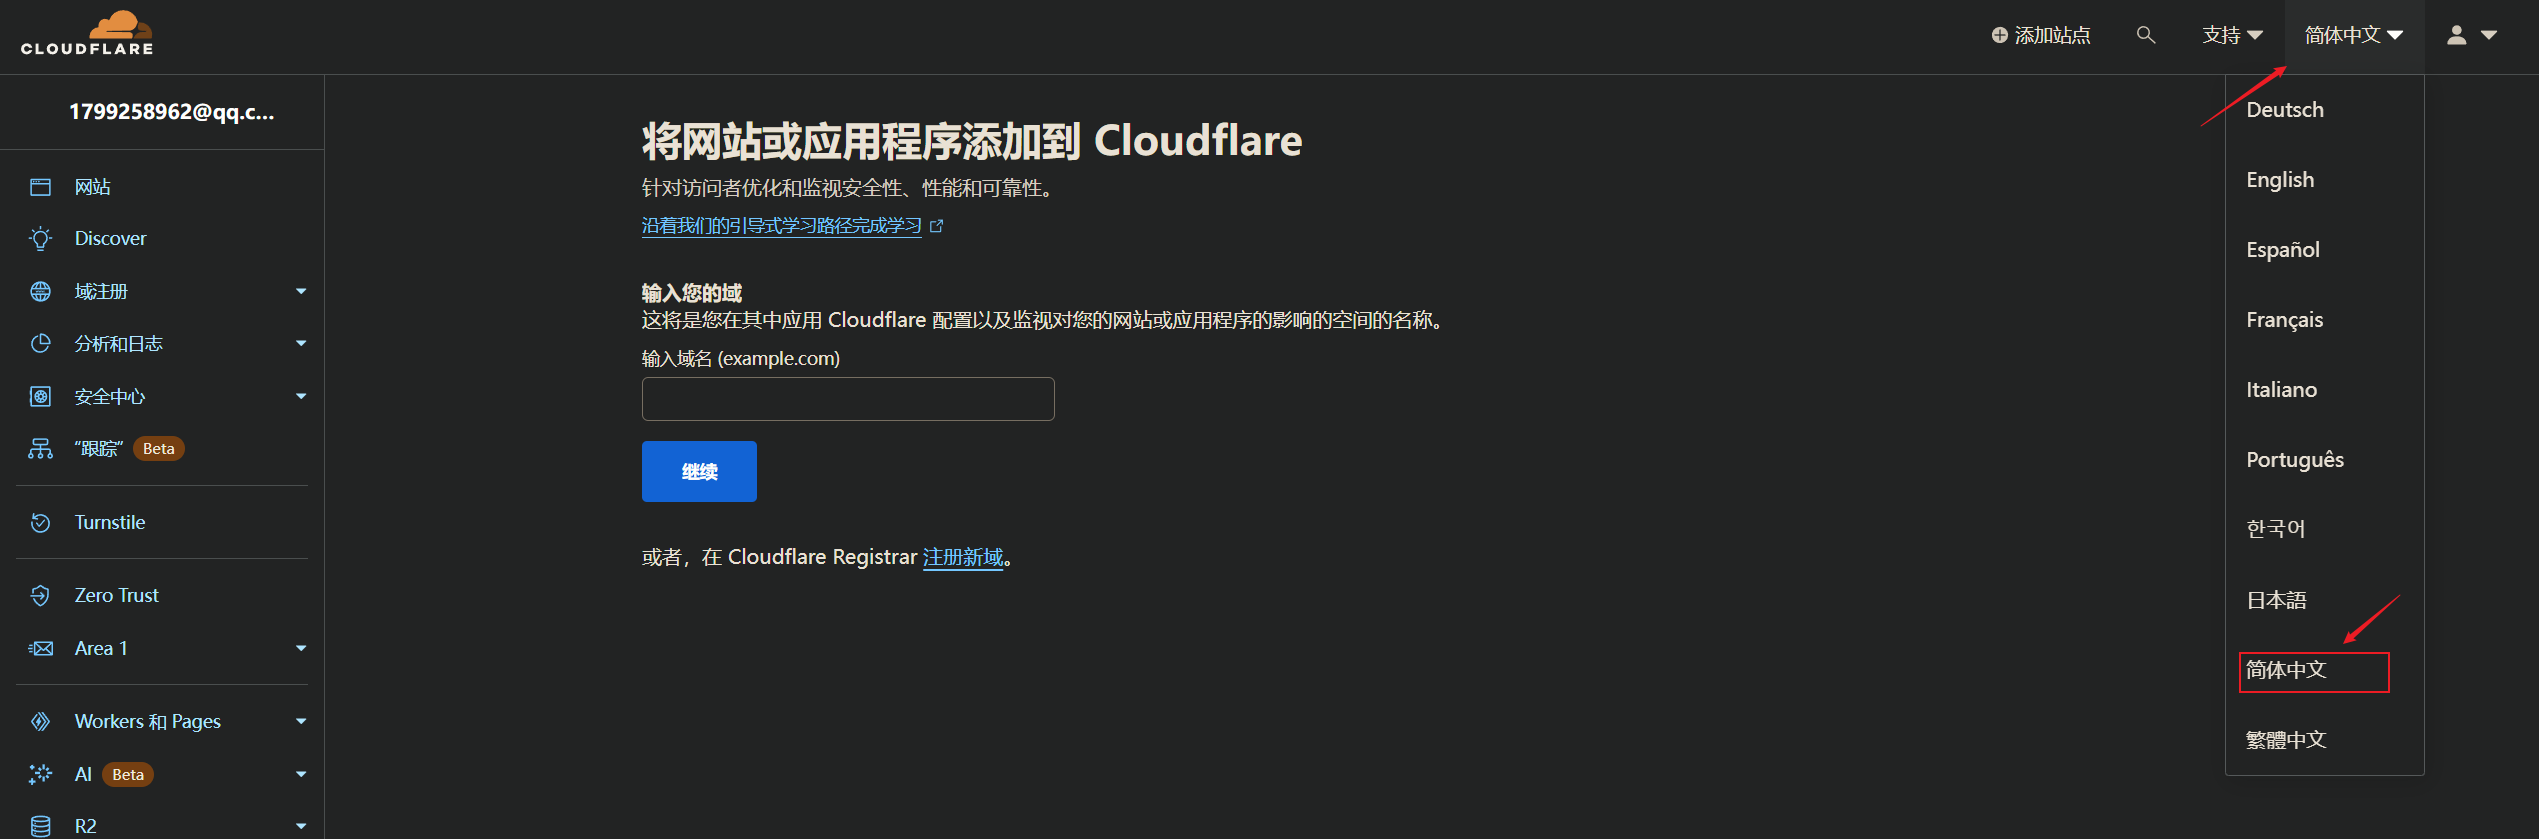
刚进入会显示为英文界面,右上角切换语言,支持简体中文:

image-20231022173855357

4.2、添加域名

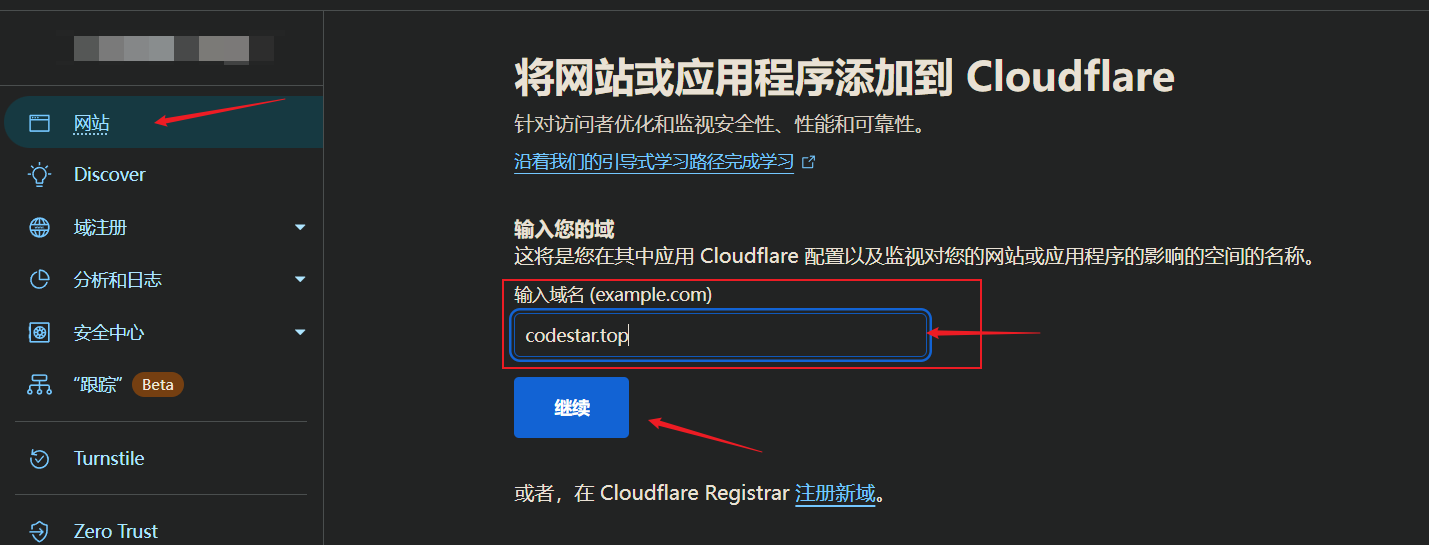
在网站中添加自己的域名,点击继续开始绑定:

image-20231022182140400

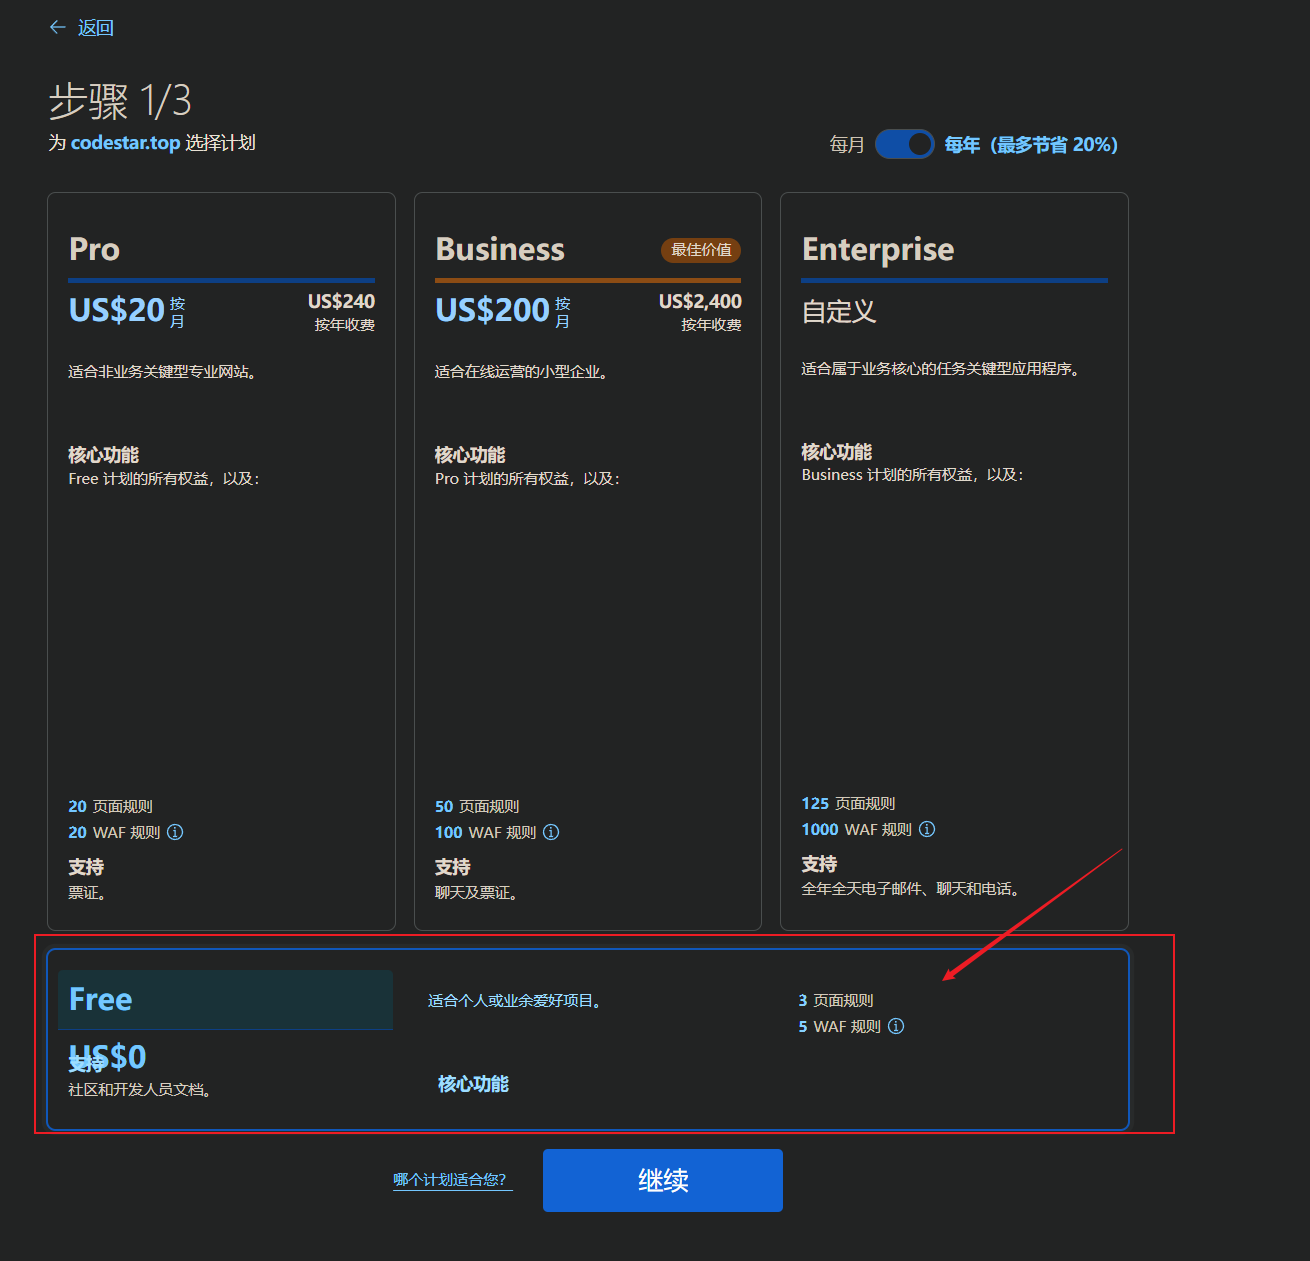
付费计划,选择免费的就行,选中之后继续:

image-20231022182248663

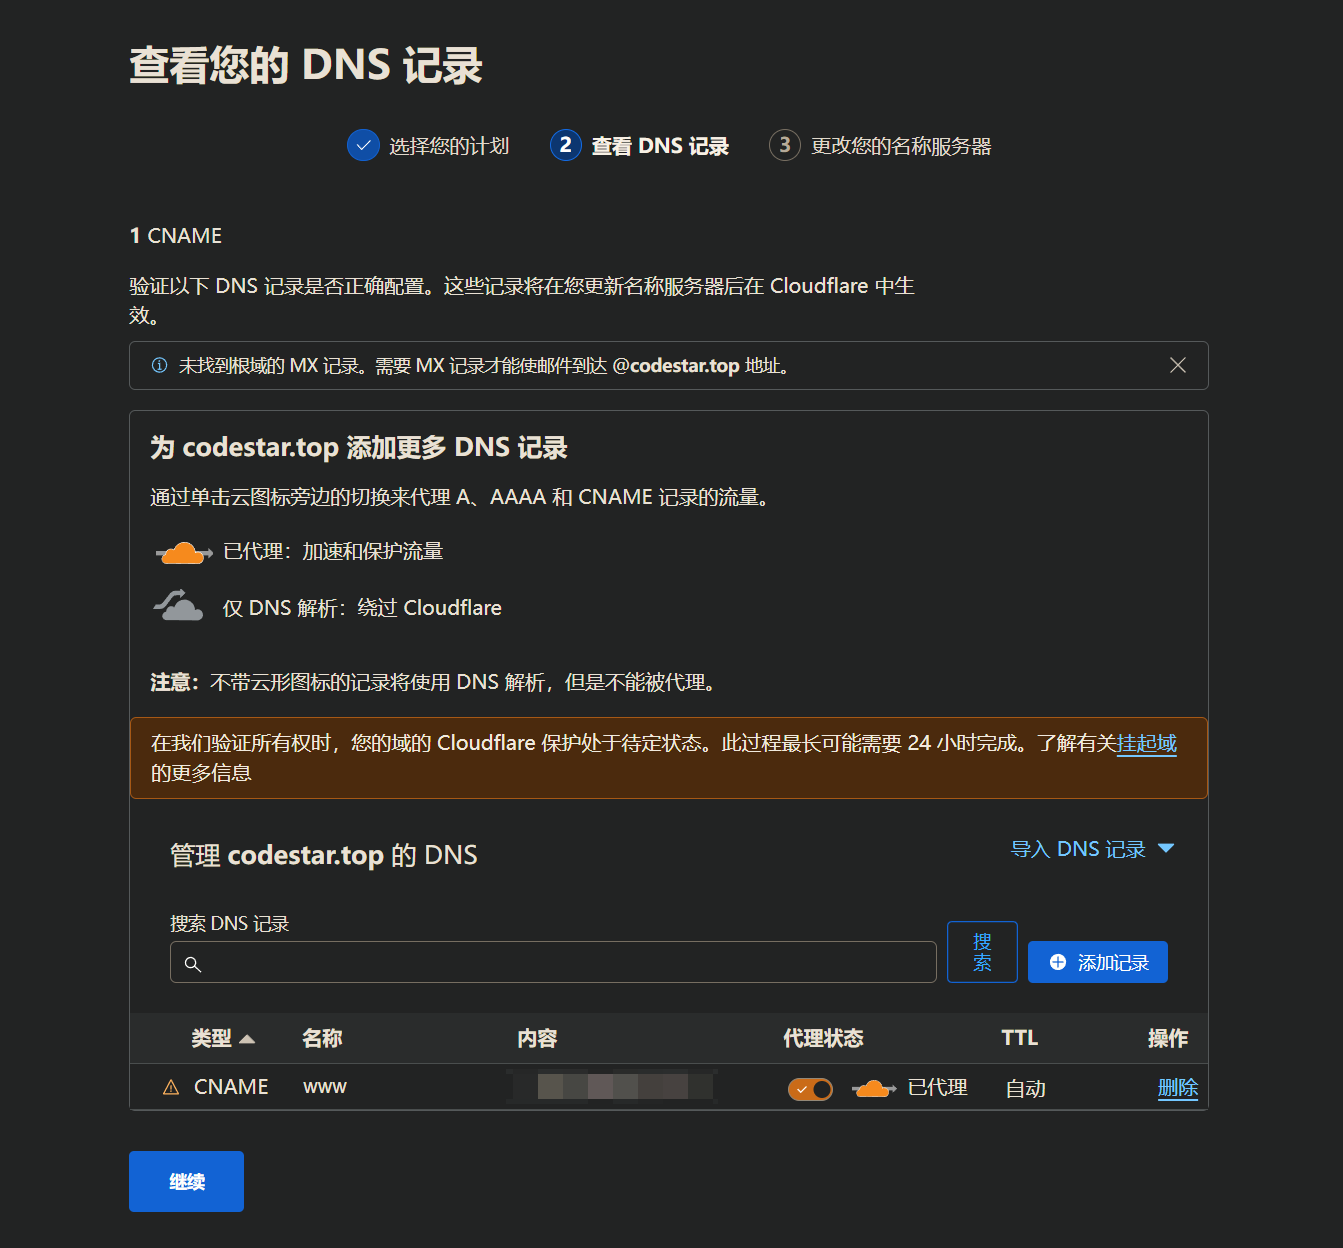
自动进行域名解析,完成之后如下:

image-20231022182502419

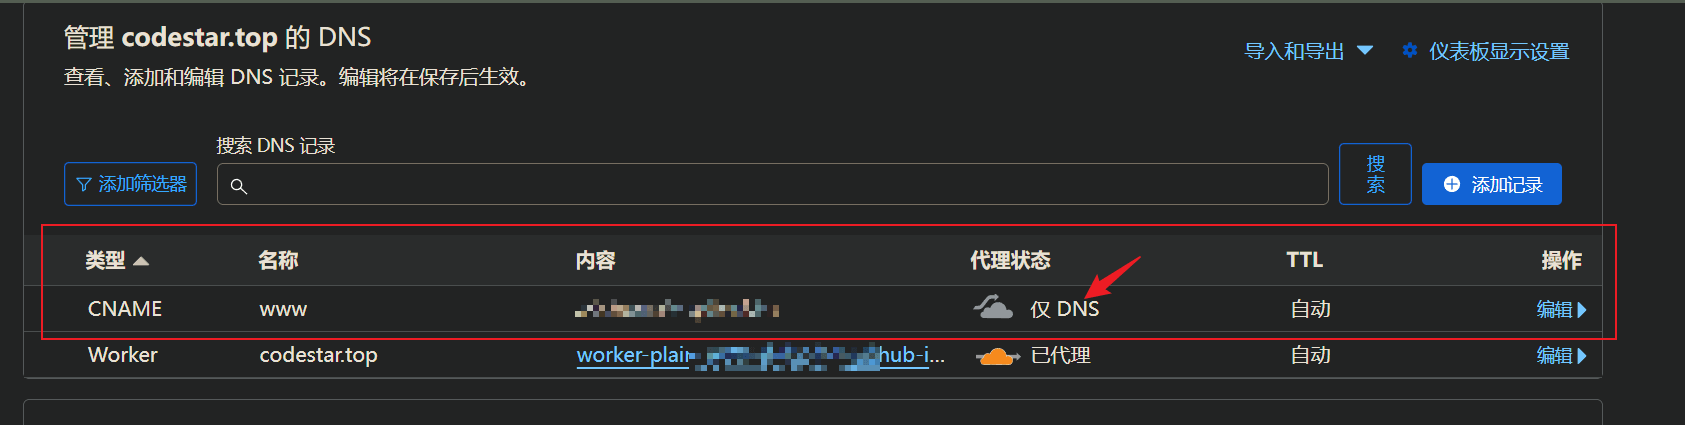
**注意:这里需要选择“仅DNS”**绕开代理,否则重定向次数太多,无法访问站点。

image-20250713143740622

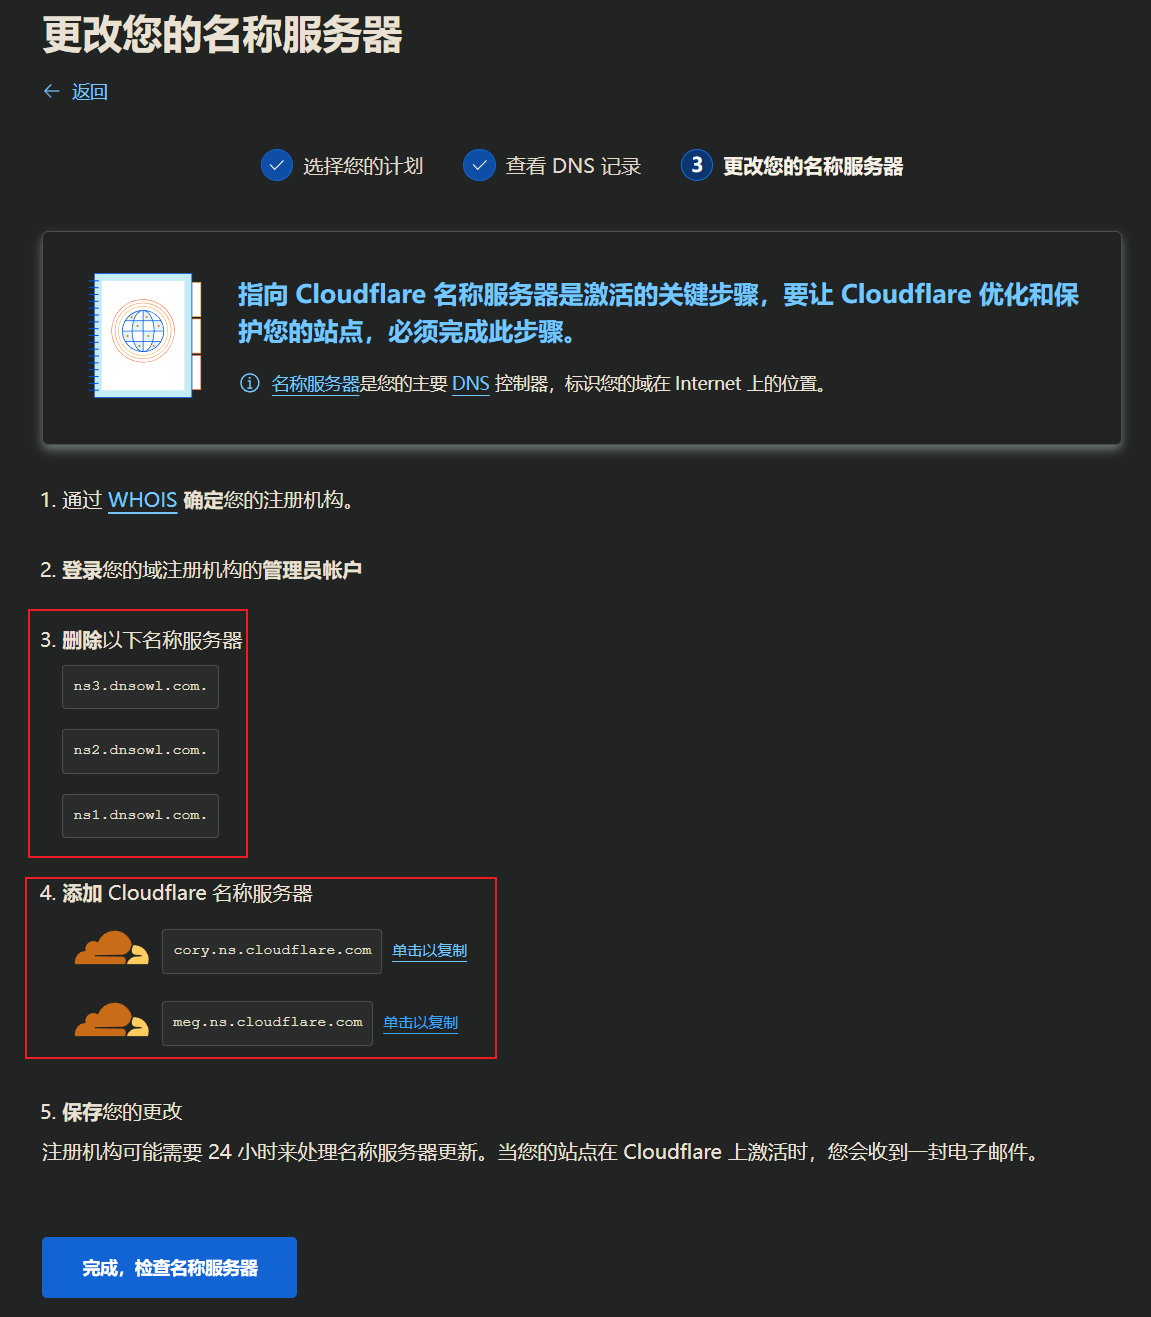
更改名称服务器:

image-20231022183620119

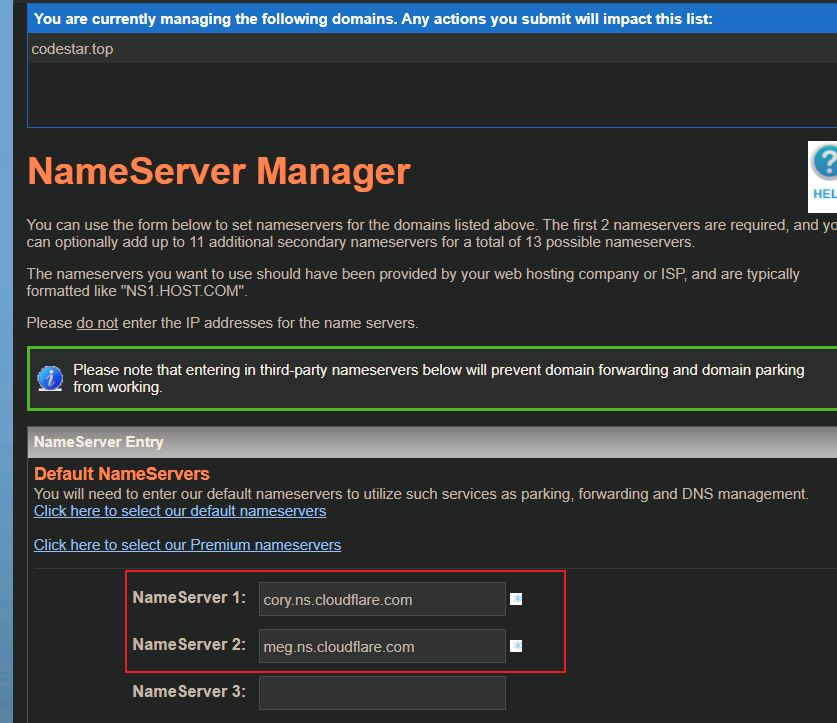
记住这里的cloudflare名称服务器,后续需要将原始的名称服务器(删除一下名称服务器部分)替换为cloudflare的。

4.3、修改域名DNS

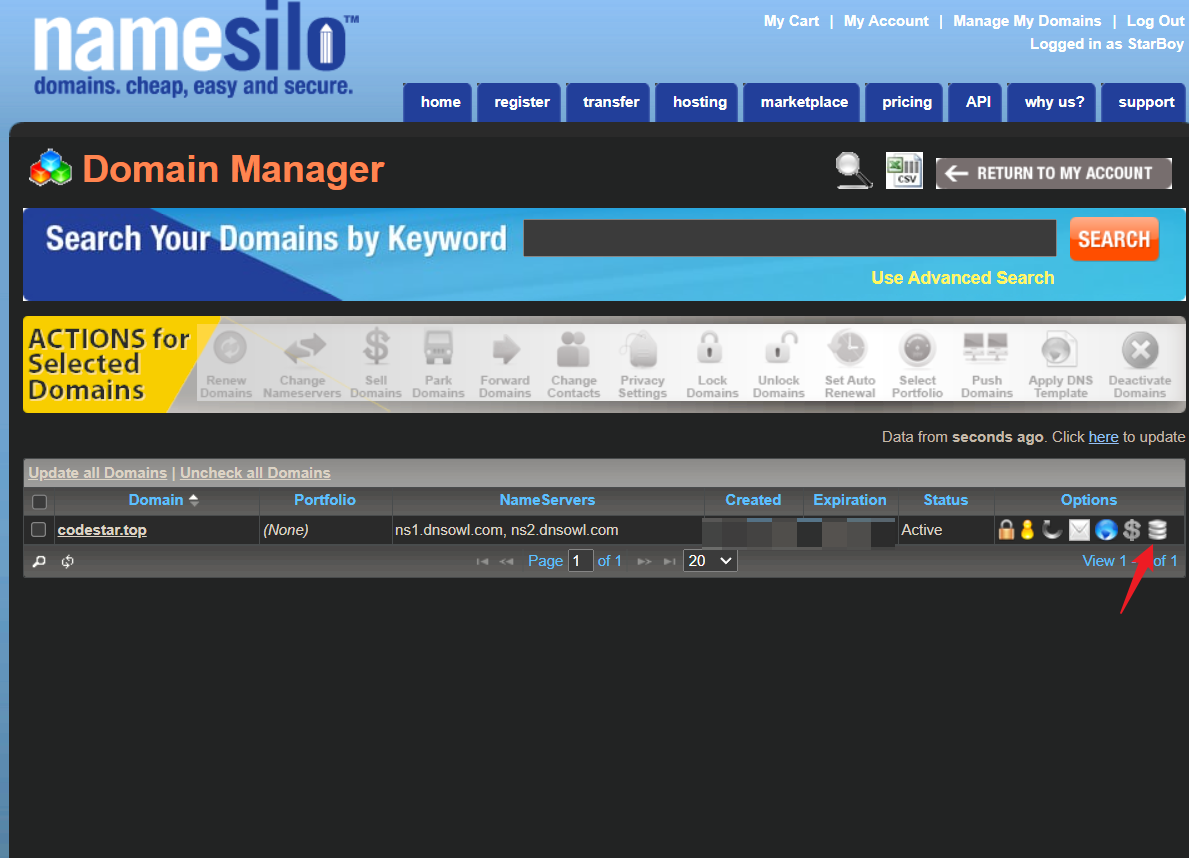
由于我的域名是namesoli平台的,这里是进入namesoli域名管理平台,其他平台同理:

image-20231022183028285

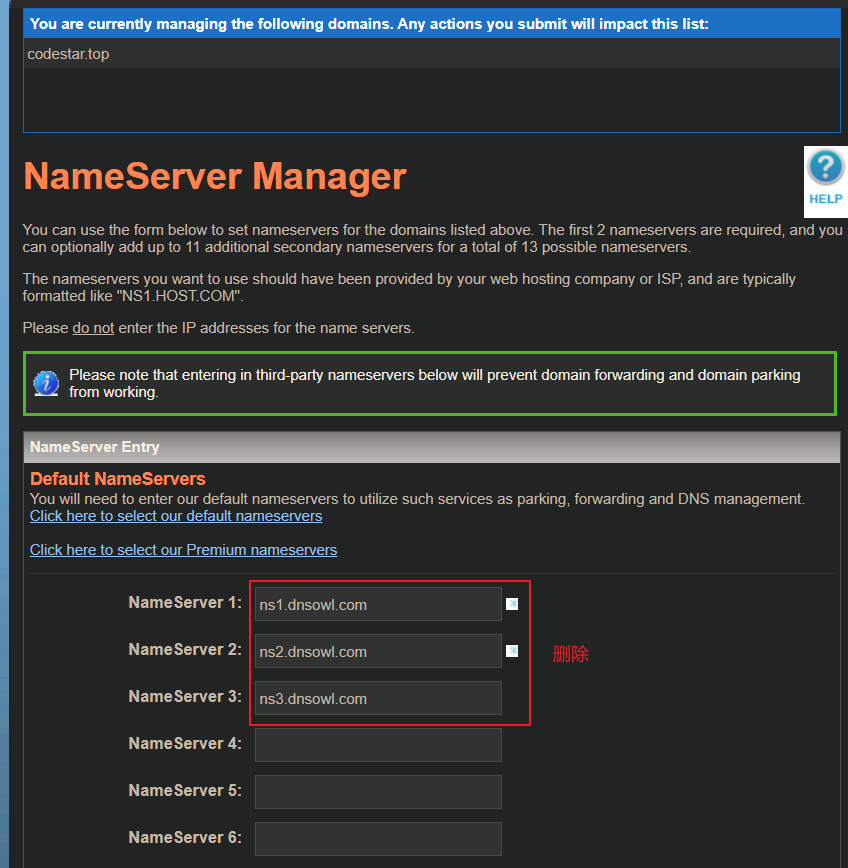
删除原来的名称服务器:

image-20231022183209677

将cloudflare的名称服务器加入:

image-20231022183303283

之后SUBMIT提交即可。提交之后注册机构需要一定的时间来处理DNS,最长24H之后就被cloudflare接管,实际大概15分钟左右就能够处理好。

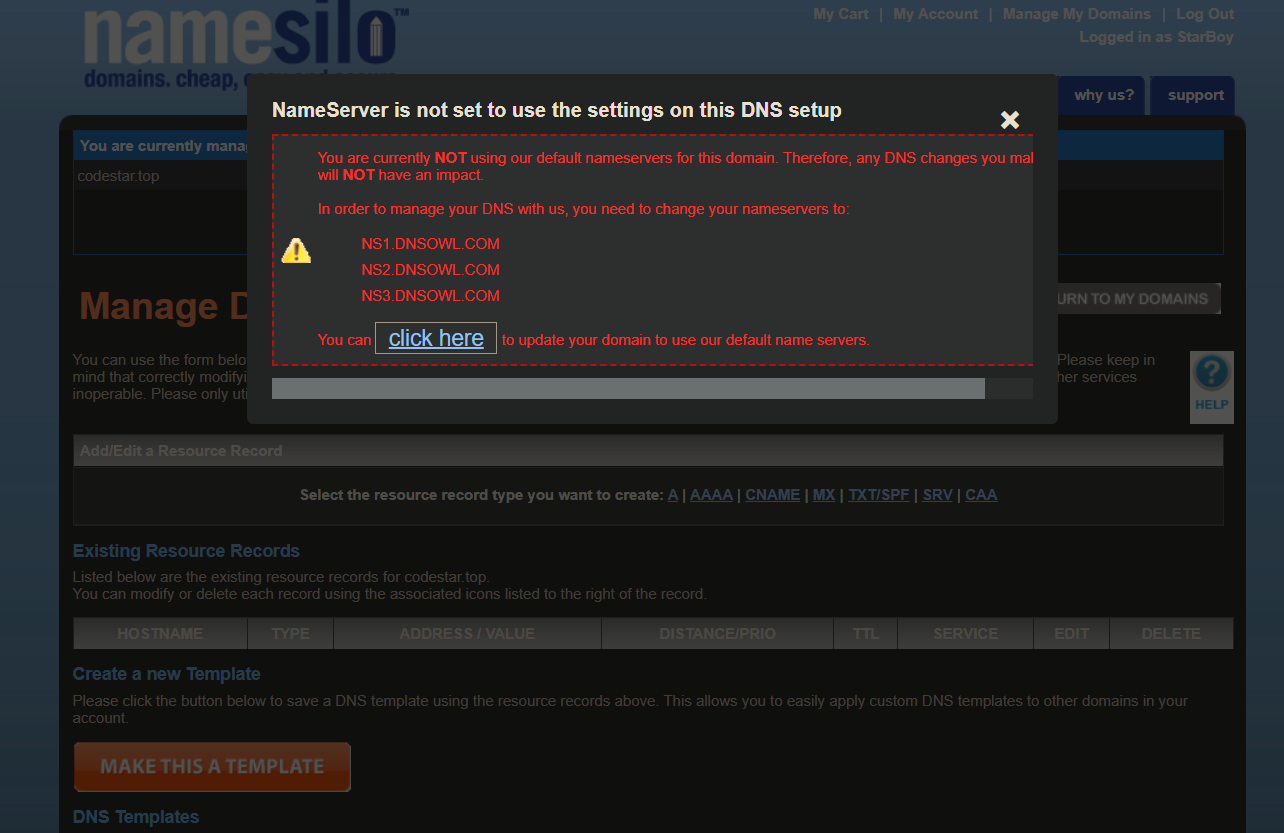
在域名解析页,删除原有解析内容,会出现这个提示,无需理会,X掉,继续:

image-20231022202302186

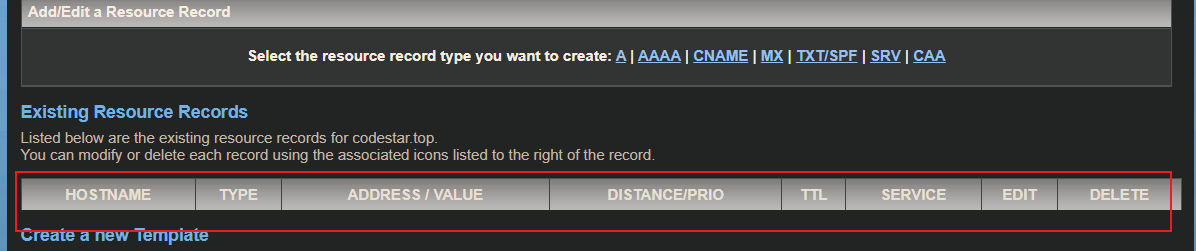
保持下面这部分内容为空,后续的所有域名解析均迁移至CloudFlare中进行配置:

image-20231022202350041

4.4、配置图片处理工作流(cloudflare worker)

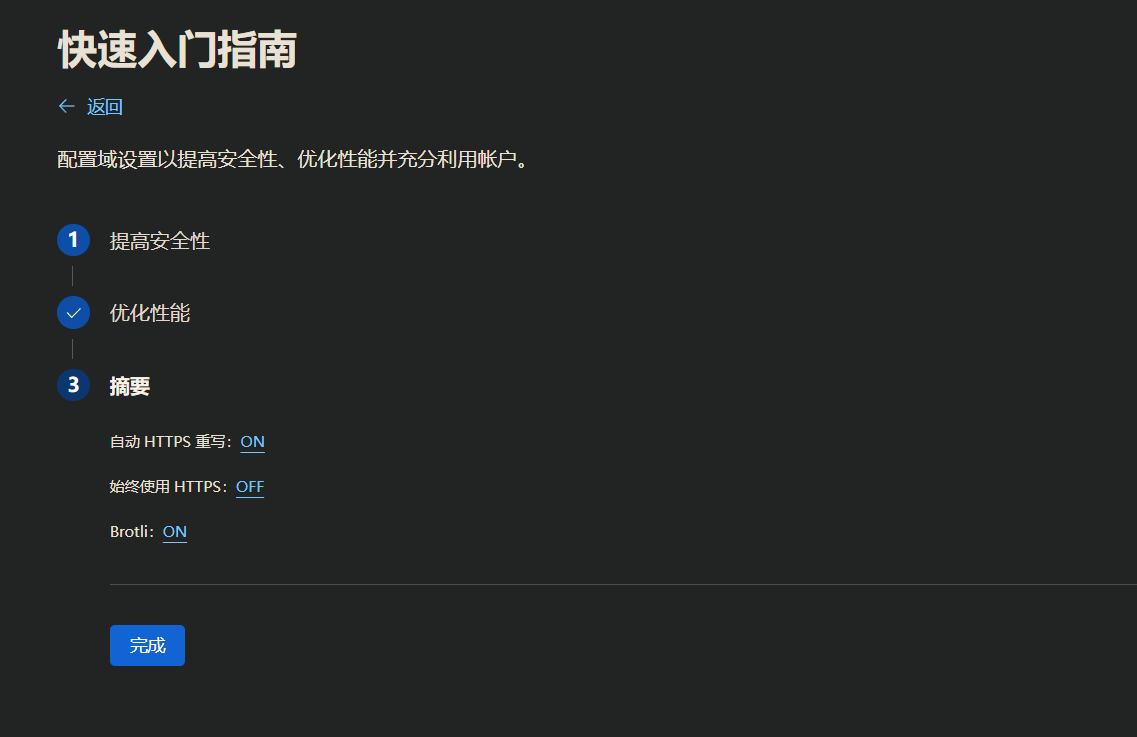
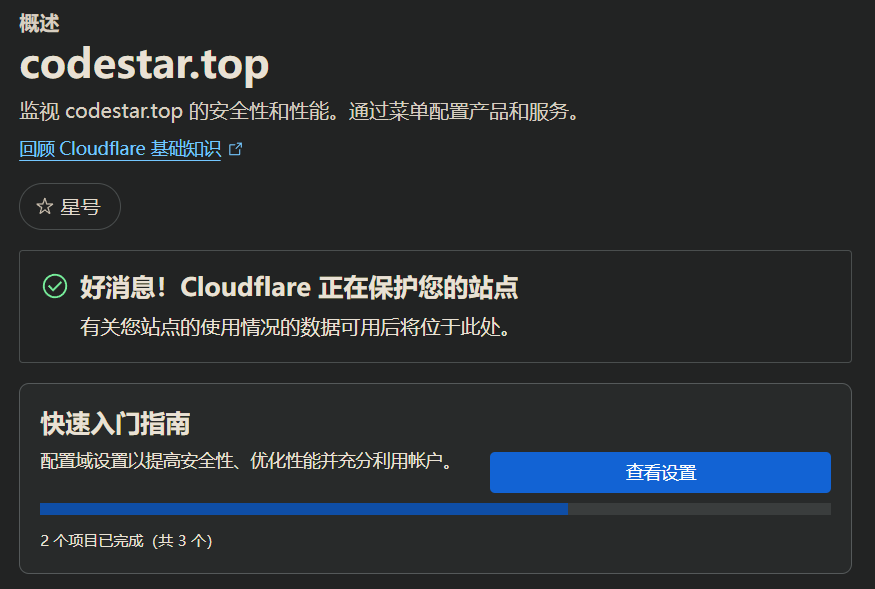
完成上一步之后,在CloudFlare中继续下一步,按照页面推荐完成配置(自动HTTPS重写设置为ON):

image-20231022184041318

image-20231022184425035

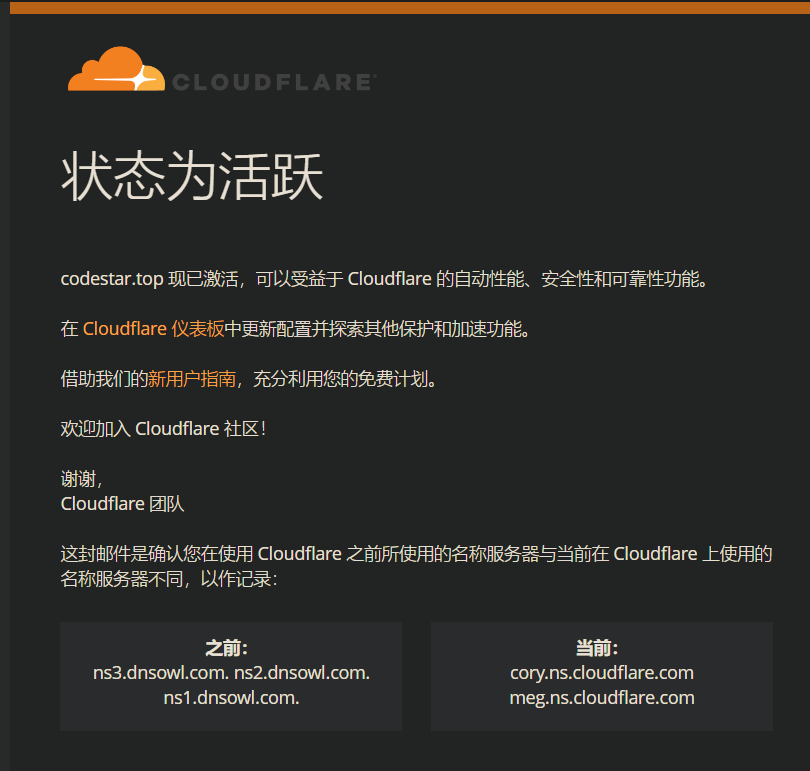
成功激活之后会收到1封邮件:

image-20231022184539008

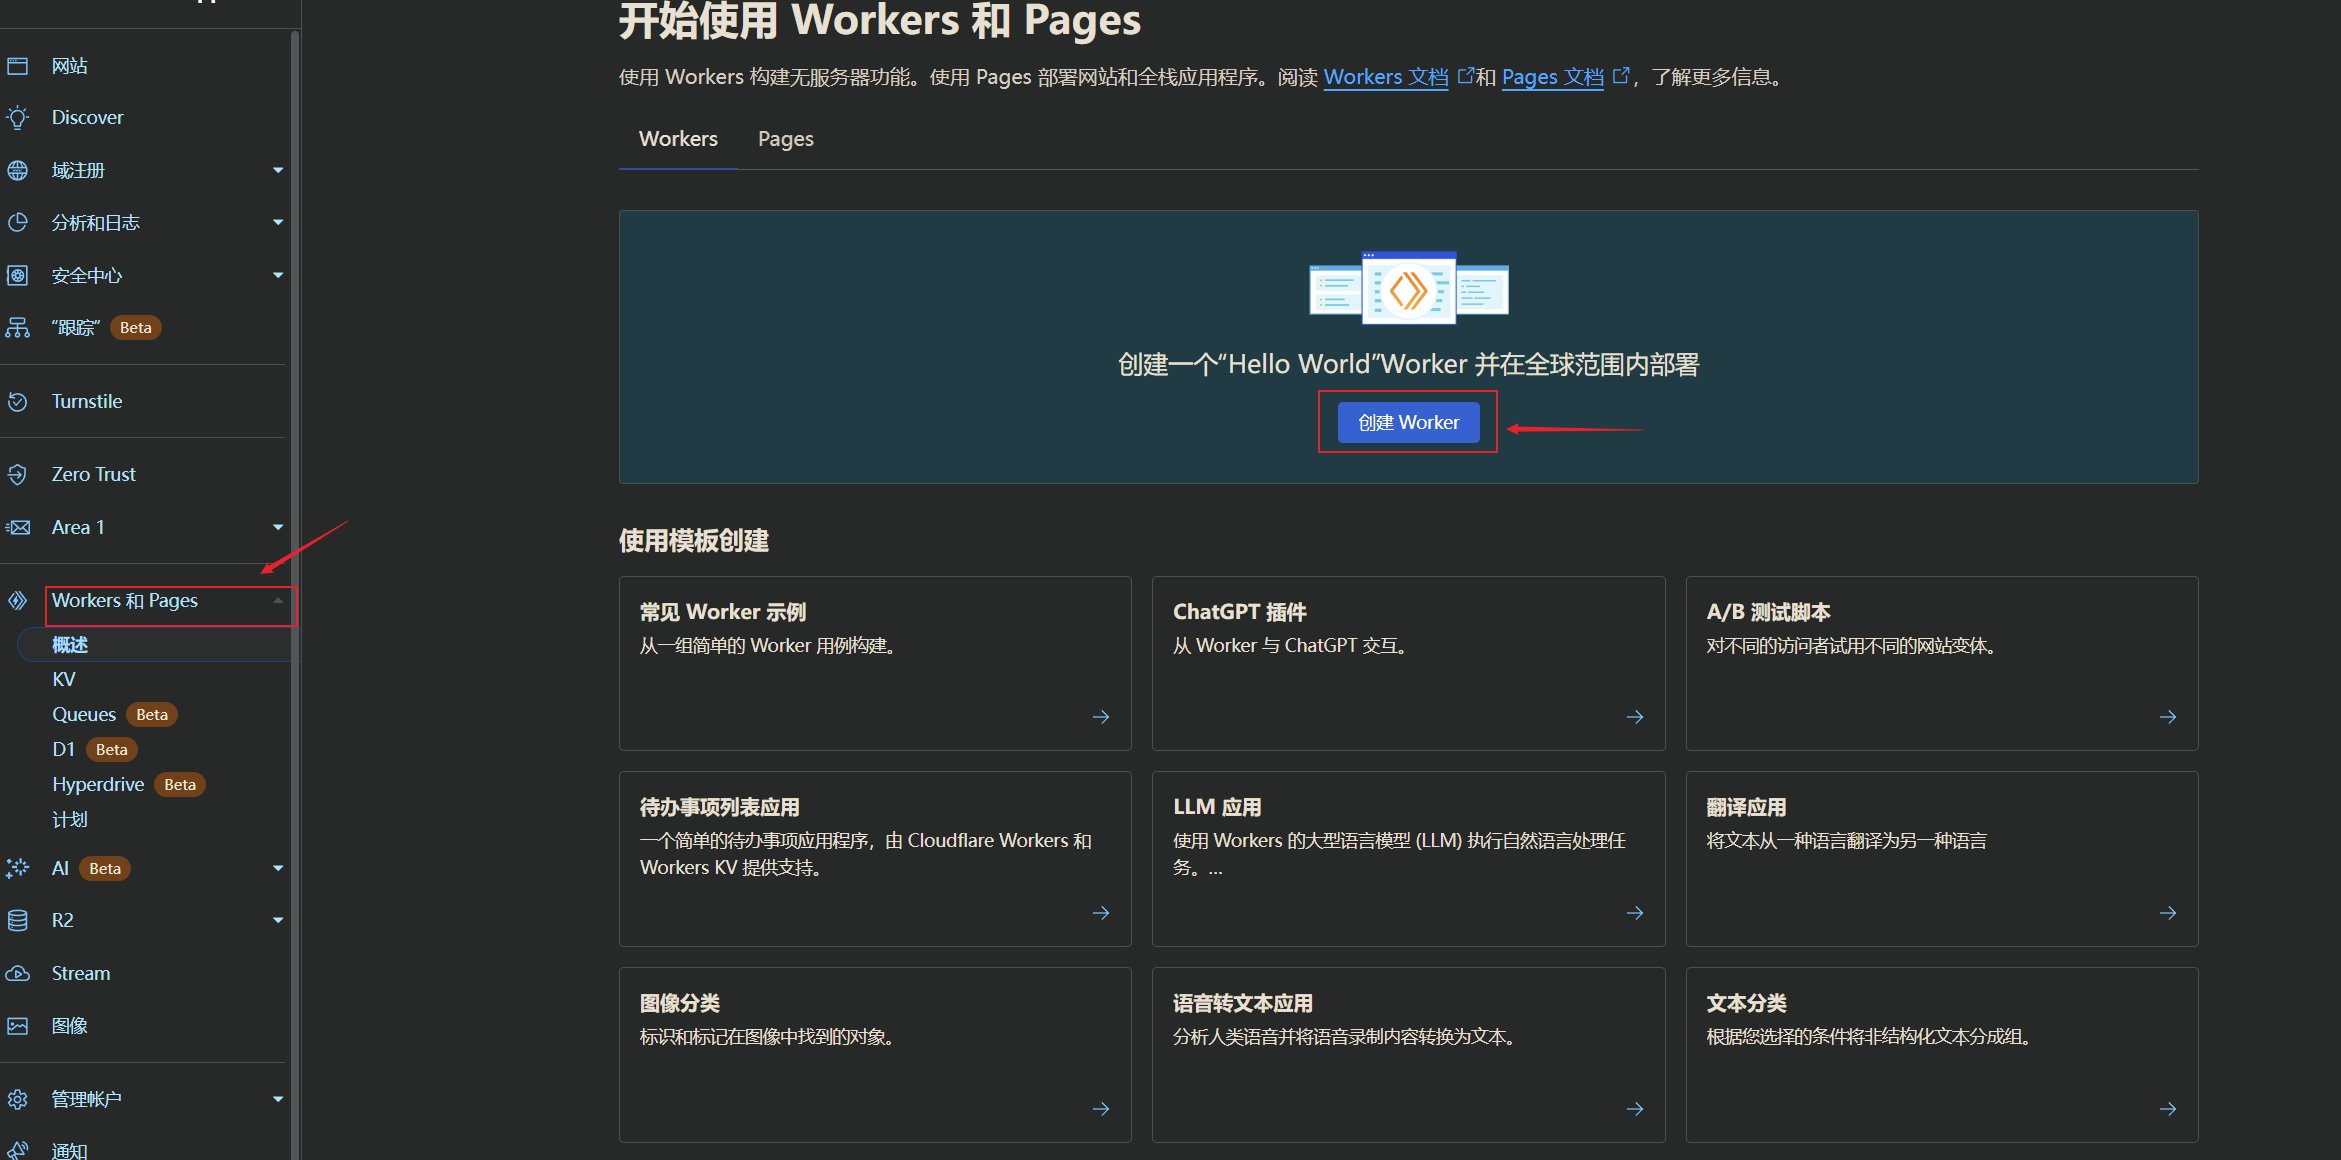
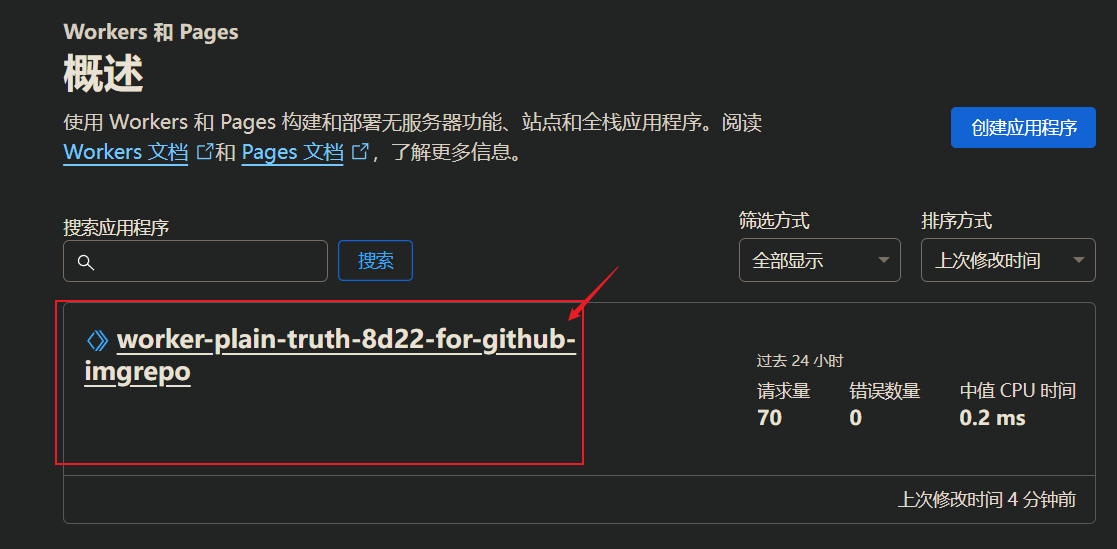
进入Workers 和 Pages创建work工作流:

image-20231022183705621

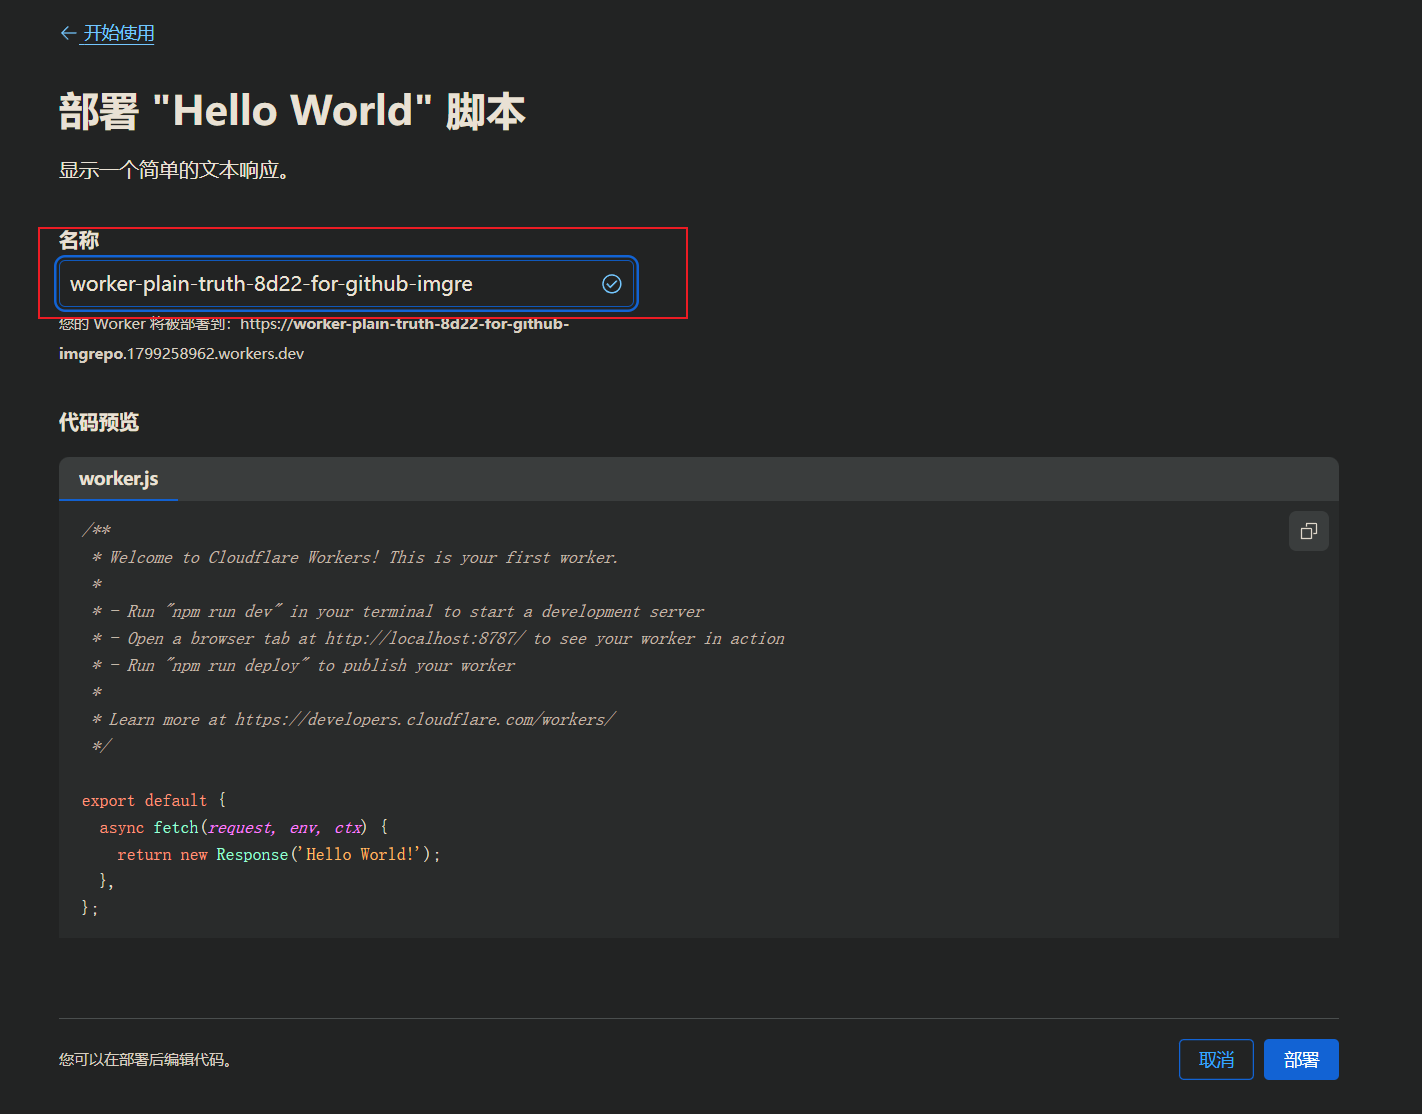
自定义部署名称,之后点击部署:

image-20231022175630817

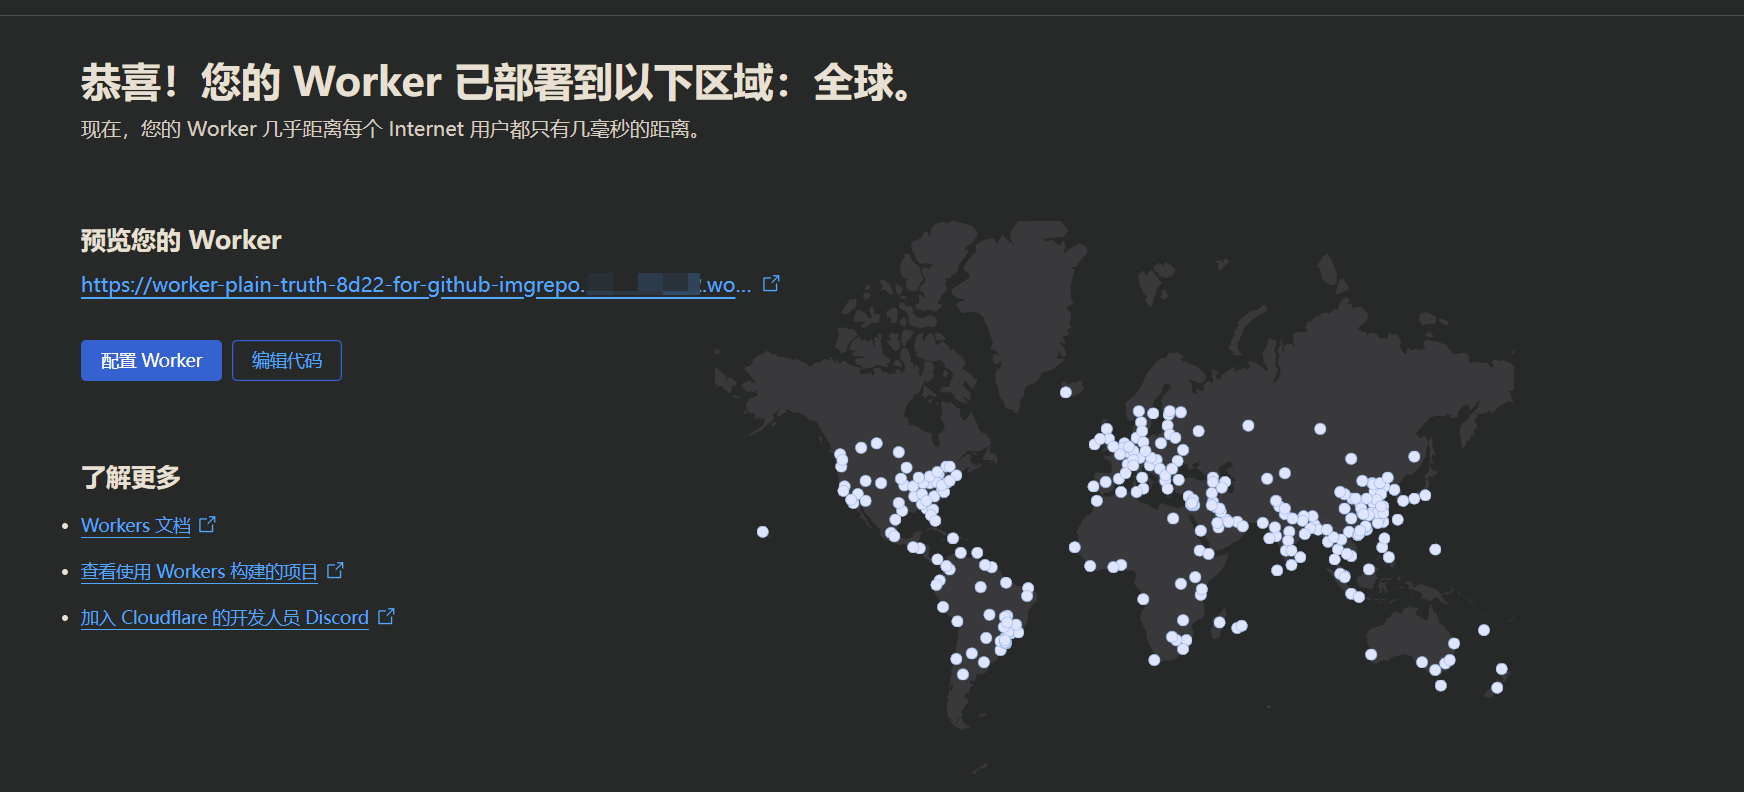
部署成功会进入下面的页面:

image-20231022183726349

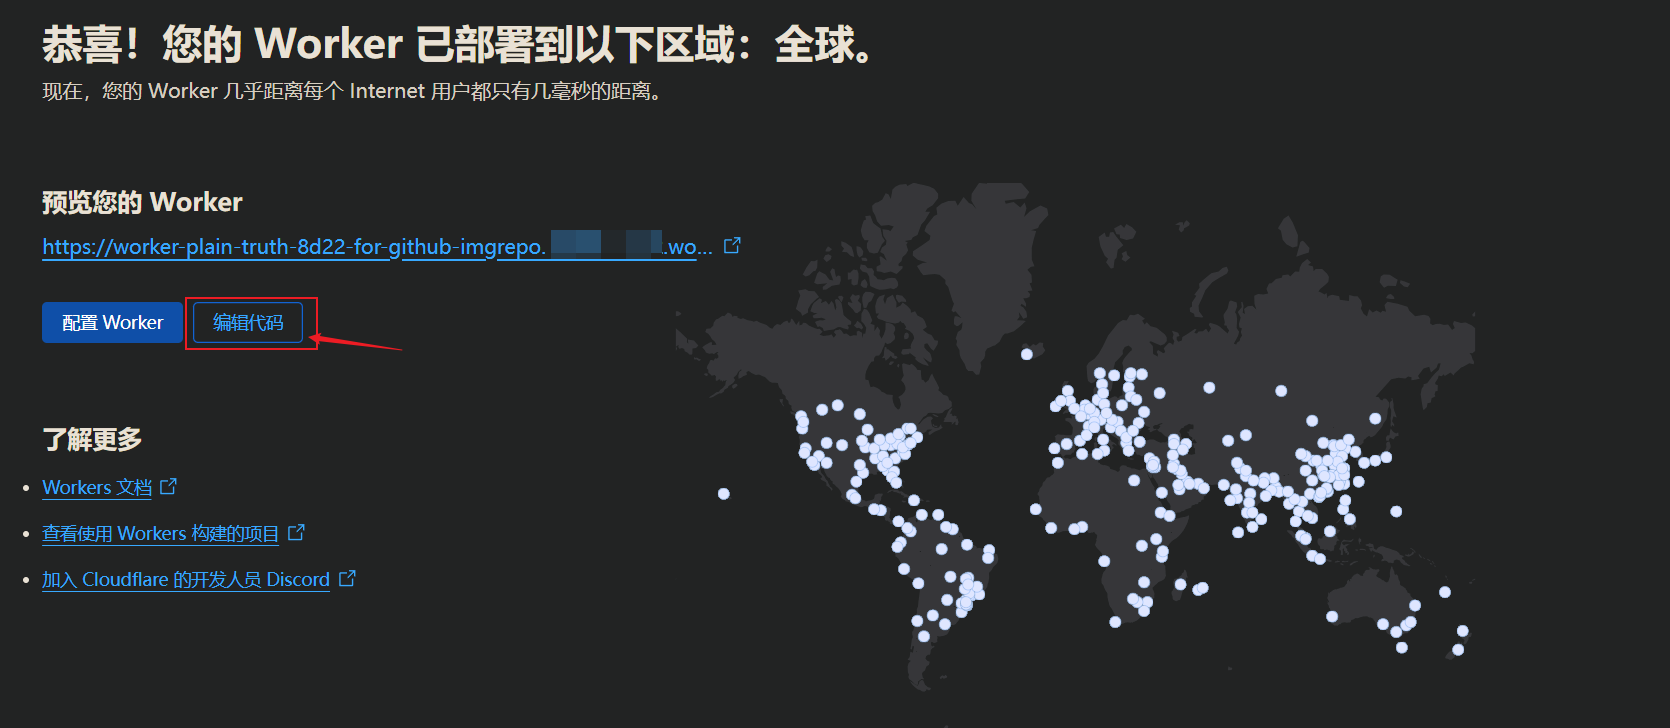
进入编辑代码:

image-20231022175936381

在JS编辑面板中贴入下面的代码:

1
2
3
4
5
6
7
8
9
10
11
12
13
14
15
16
17
18
19
20
21
22
23
24
25
26
27
28
29
30
31
32
33
34
35
36
37
38
39
40
41
42
43
44
45
46
47
48
49
50
51
52
53
54
55
56
57
58
59
60
61
62
63
64
65
66
67
68
69
70
71
72
73
74
75
76
77
78
79
80
81
82
83
84
85
86
87
88
89
90
91
92
93
94
95
96
97
98
99
100
101
102
103
104
105
106
107
108
109
110
111
112
113
114
115
116
117
118
119
120
121
122
123
124
125
126
127
128
129
130
131
132
133
134
135
136
137
138
139
140
141
142
143
144
145
146
147
148
149
150
151
152
153
154
155
156
157
158
159
160
161
162
163
164
165
166
167
168
169
170
171
172
173
174
175
176
177
178
179
180
181
182
183
184
185
186
187
188
189
// Website you intended to retrieve for users.
const upstream = "raw.githubusercontent.com";

// Custom pathname for the upstream website.
// (1) 填写代理的路径,格式为 /<用户>/<仓库名>/<分支>
const upstream_path = "****";

// github personal access token.
// (2) 填写github令牌
const github_token = "****";

// Website you intended to retrieve for users using mobile devices.
const upstream_mobile = upstream;

// Countries and regions where you wish to suspend your service.
const blocked_region = [];

// IP addresses which you wish to block from using your service.
const blocked_ip_address = ["0.0.0.0", "127.0.0.1"];

// Whether to use HTTPS protocol for upstream address.
const https = true;

// Whether to disable cache.
const disable_cache = false;

// Replace texts.
const replace_dict = {
$upstream: "$custom_domain",
};

addEventListener("fetch", (event) => {
event.respondWith(fetchAndApply(event.request));
});

async function fetchAndApply(request) {
const region = request.headers.get("cf-ipcountry")?.toUpperCase();
const ip_address = request.headers.get("cf-connecting-ip");
const user_agent = request.headers.get("user-agent");

let response = null;
let url = new URL(request.url);
let url_hostname = url.hostname;

if (https == true) {
url.protocol = "https:";
} else {
url.protocol = "http:";
}

if (await device_status(user_agent)) {
var upstream_domain = upstream;
} else {
var upstream_domain = upstream_mobile;
}

url.host = upstream_domain;
if (url.pathname == "/") {
url.pathname = upstream_path;
} else {
url.pathname = upstream_path + url.pathname;
}

if (blocked_region.includes(region)) {
response = new Response(
"Access denied: WorkersProxy is not available in your region yet.",
{
status: 403,
}
);
} else if (blocked_ip_address.includes(ip_address)) {
response = new Response(
"Access denied: Your IP address is blocked by WorkersProxy.",
{
status: 403,
}
);
} else {
let method = request.method;
let request_headers = request.headers;
let new_request_headers = new Headers(request_headers);

new_request_headers.set("Host", upstream_domain);
new_request_headers.set("Referer", url.protocol + "//" + url_hostname);
new_request_headers.set("Authorization", "token " + github_token);

let original_response = await fetch(url.href, {
method: method,
headers: new_request_headers,
body: request.body,
});

let connection_upgrade = new_request_headers.get("Upgrade");
if (connection_upgrade && connection_upgrade.toLowerCase() == "websocket") {
return original_response;
}

let original_response_clone = original_response.clone();
let original_text = null;
let response_headers = original_response.headers;
let new_response_headers = new Headers(response_headers);
let status = original_response.status;

if (disable_cache) {
new_response_headers.set("Cache-Control", "no-store");
} else {
new_response_headers.set("Cache-Control", "max-age=43200000");
}

new_response_headers.set("access-control-allow-origin", "*");
new_response_headers.set("access-control-allow-credentials", "true");
new_response_headers.delete("content-security-policy");
new_response_headers.delete("content-security-policy-report-only");
new_response_headers.delete("clear-site-data");

if (new_response_headers.get("x-pjax-url")) {
new_response_headers.set(
"x-pjax-url",
response_headers
.get("x-pjax-url")
.replace("//" + upstream_domain, "//" + url_hostname)
);
}

const content_type = new_response_headers.get("content-type");
if (
content_type != null &&
content_type.includes("text/html") &&
content_type.includes("UTF-8")
) {
original_text = await replace_response_text(
original_response_clone,
upstream_domain,
url_hostname
);
} else {
original_text = original_response_clone.body;
}

response = new Response(original_text, {
status,
headers: new_response_headers,
});
}
return response;
}

async function replace_response_text(response, upstream_domain, host_name) {
let text = await response.text();

var i, j;
for (i in replace_dict) {
j = replace_dict[i];
if (i == "$upstream") {
i = upstream_domain;
} else if (i == "$custom_domain") {
i = host_name;
}

if (j == "$upstream") {
j = upstream_domain;
} else if (j == "$custom_domain") {
j = host_name;
}

let re = new RegExp(i, "g");
text = text.replace(re, j);
}
return text;
}

async function device_status(user_agent_info) {
var agents = [
"Android",
"iPhone",
"SymbianOS",
"Windows Phone",
"iPad",
"iPod",
];
var flag = true;
for (var v = 0; v < agents.length; v++) {
if (user_agent_info.indexOf(agents[v]) > 0) {
flag = false;
break;
}
}
return flag;
}

需要修改的地方有:

1
2
3
4
5
6
7
// Custom pathname for the upstream website.
// (1) 填写代理的路径,格式为 /<用户>/<仓库名>/<分支>
const upstream_path = "****";

// github personal access token.
// (2) 填写github令牌
const github_token = "****";

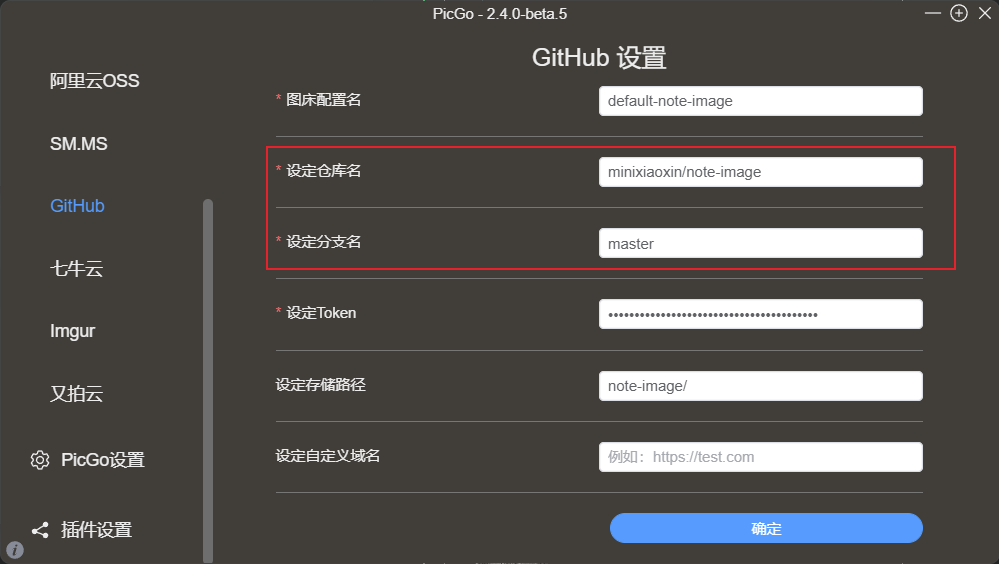
按照PicGo中配置的内容来填入即可:

image-20231022183805035

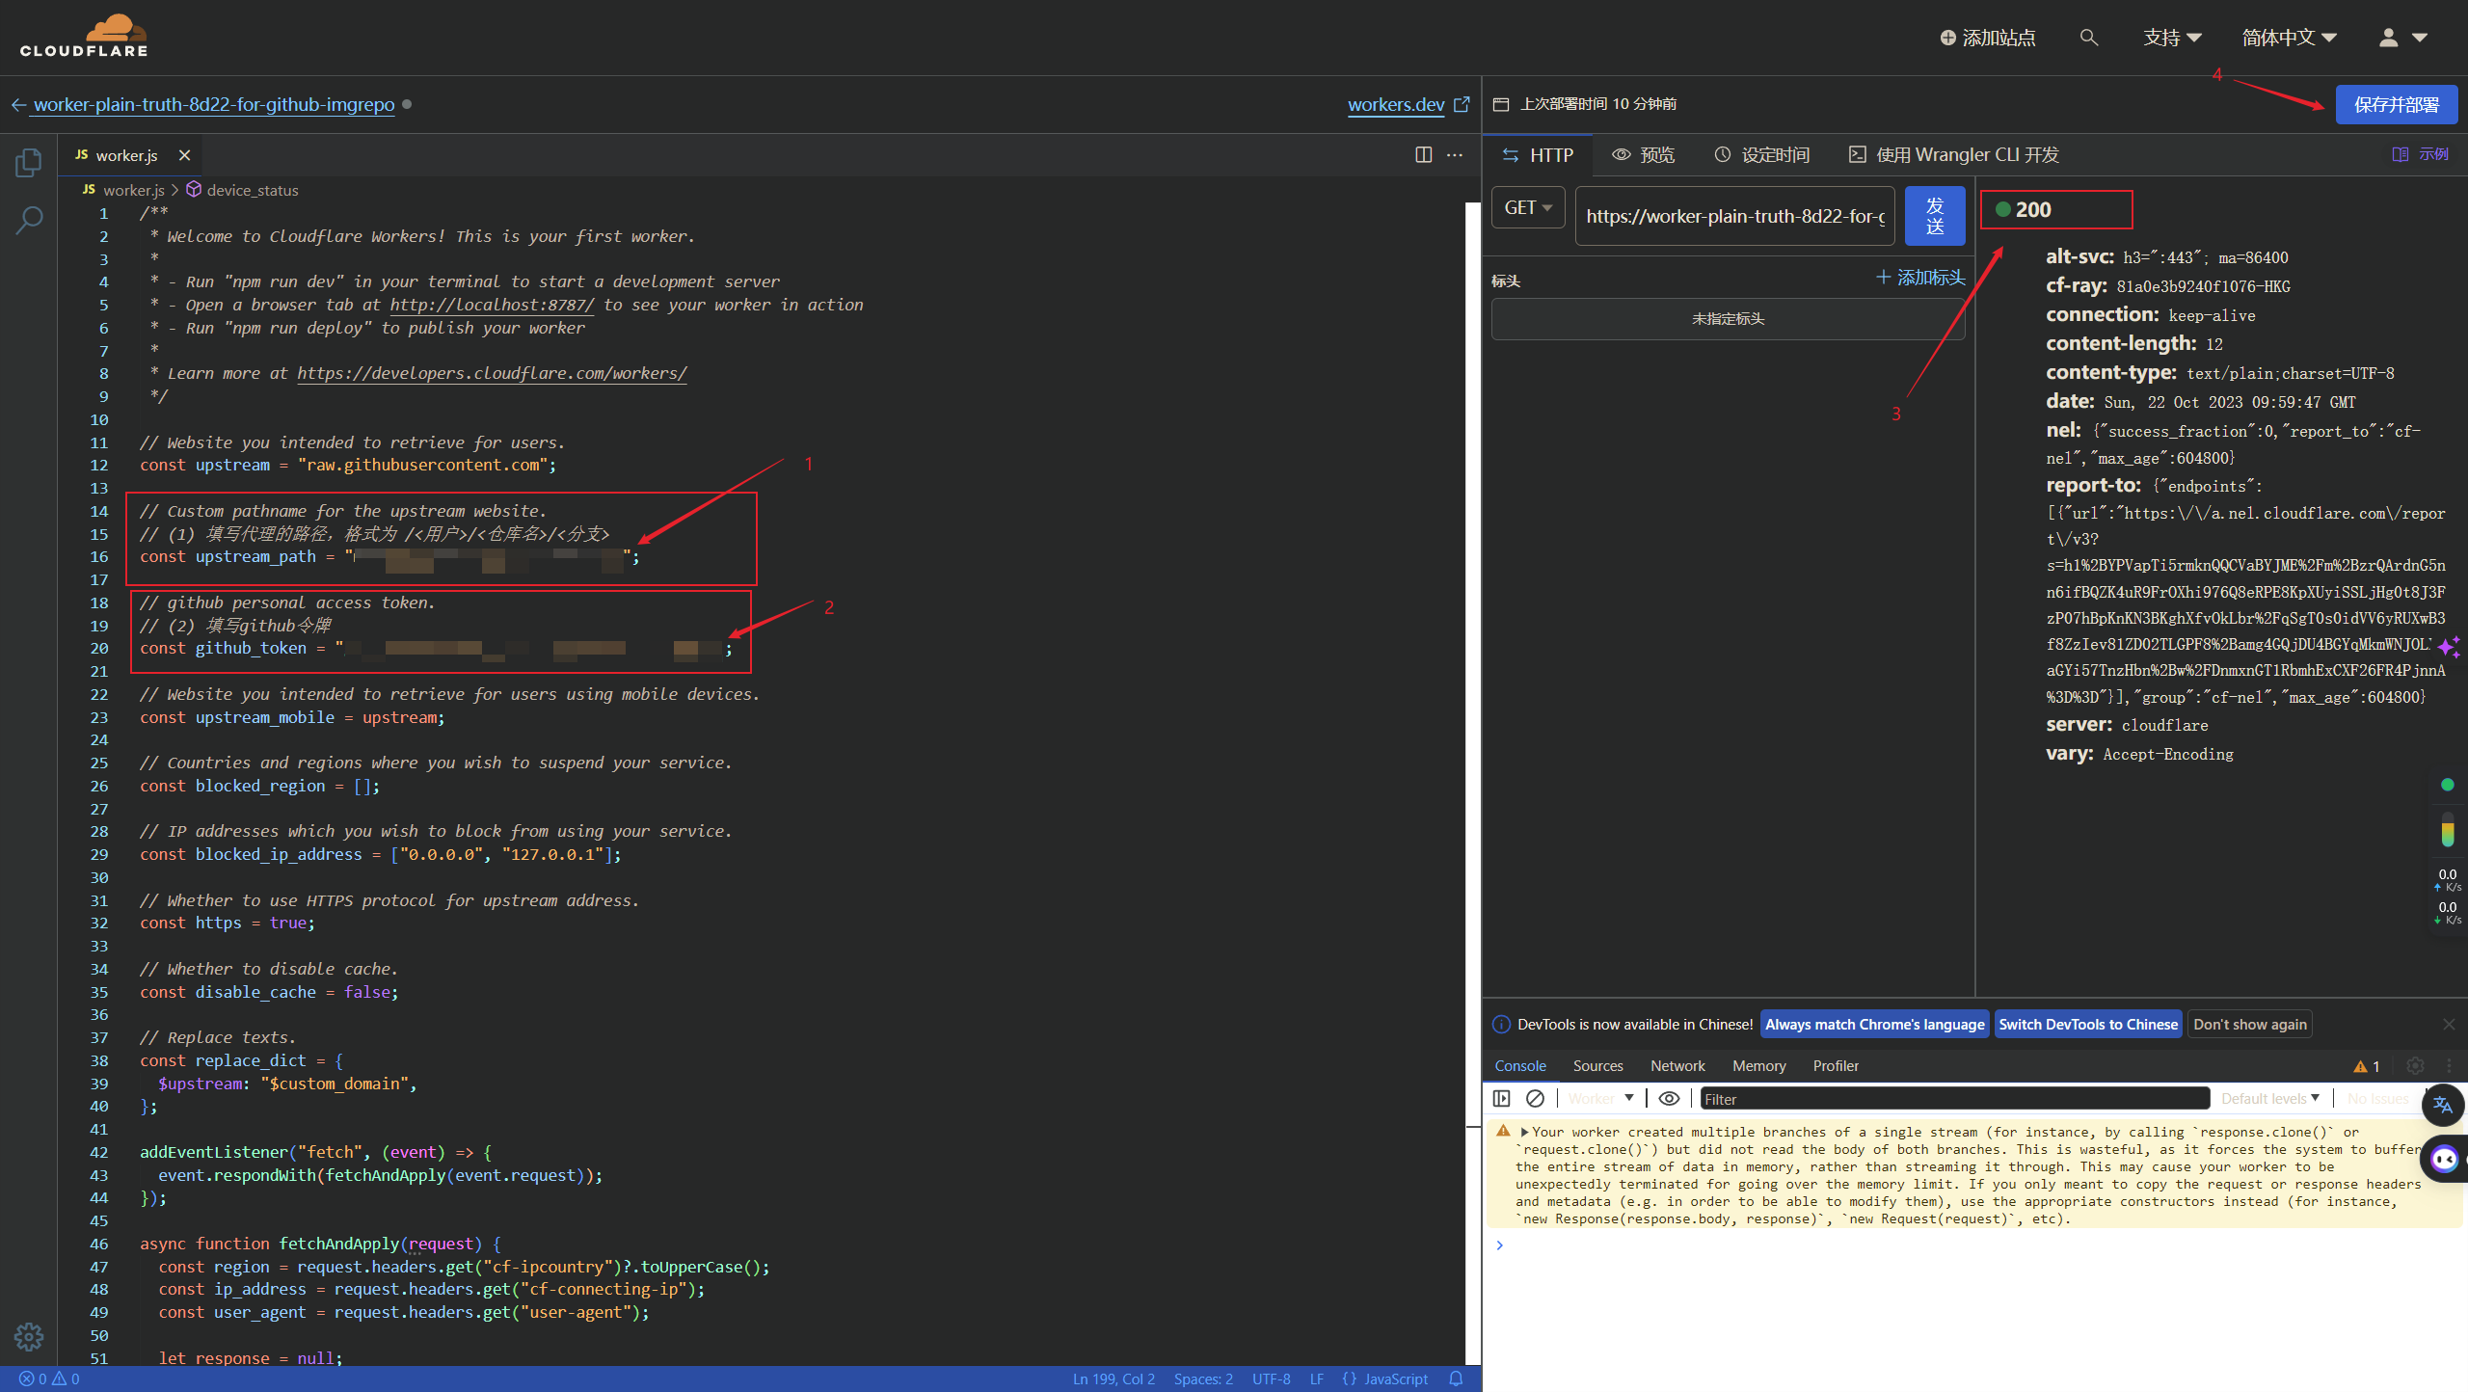
修改完成之后,点击“发送”测试是否正常,当响应码为200即为配置成功,之后则点击保存并部署:

image-20231022183832490

4.5、绑定域名

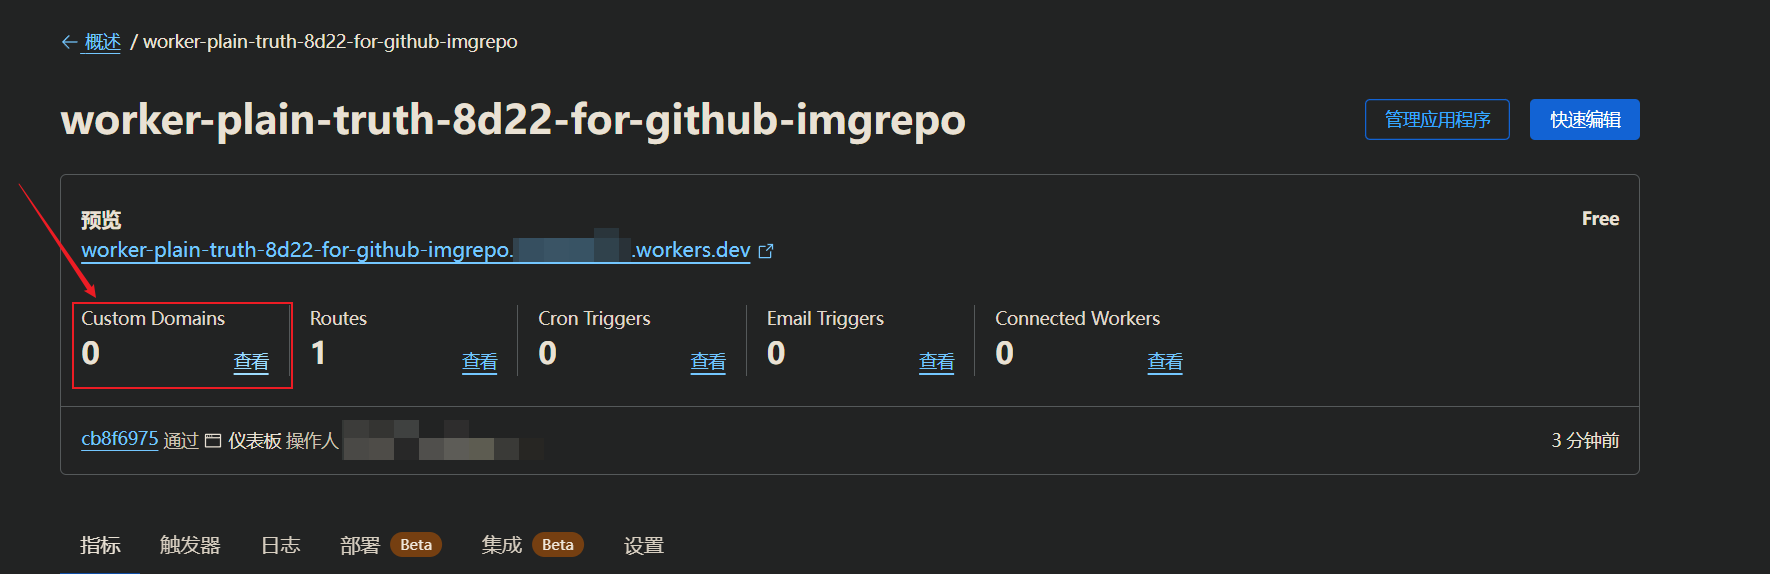
进入到刚才工作流的控制页面:

image-20231022181344156

查看Custome Domains:

image-20231022181253090

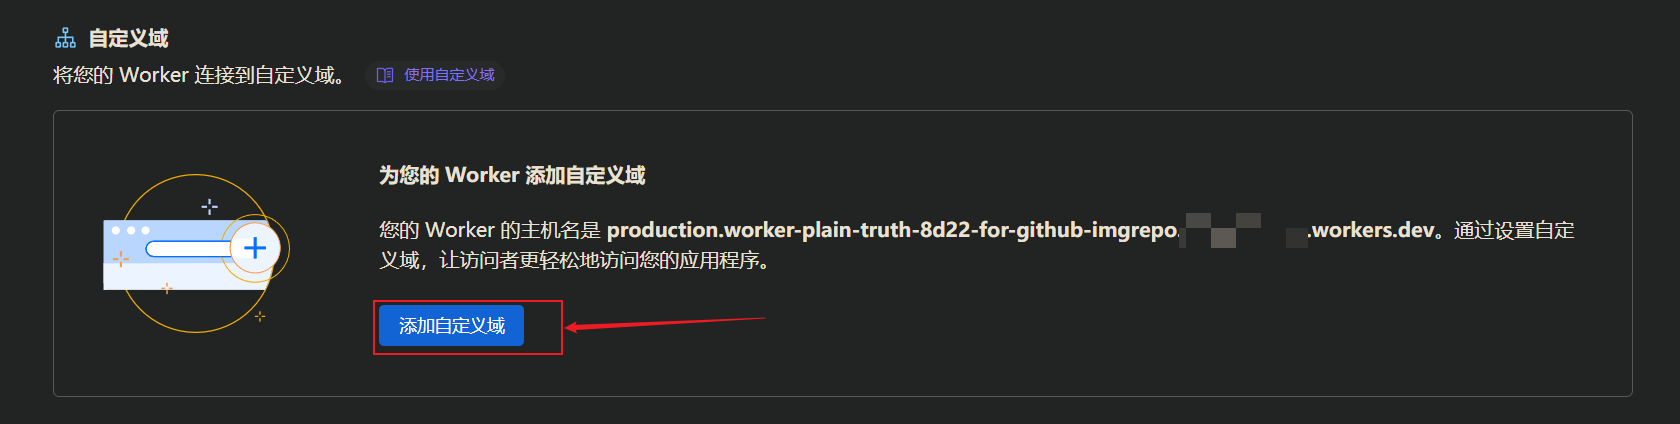
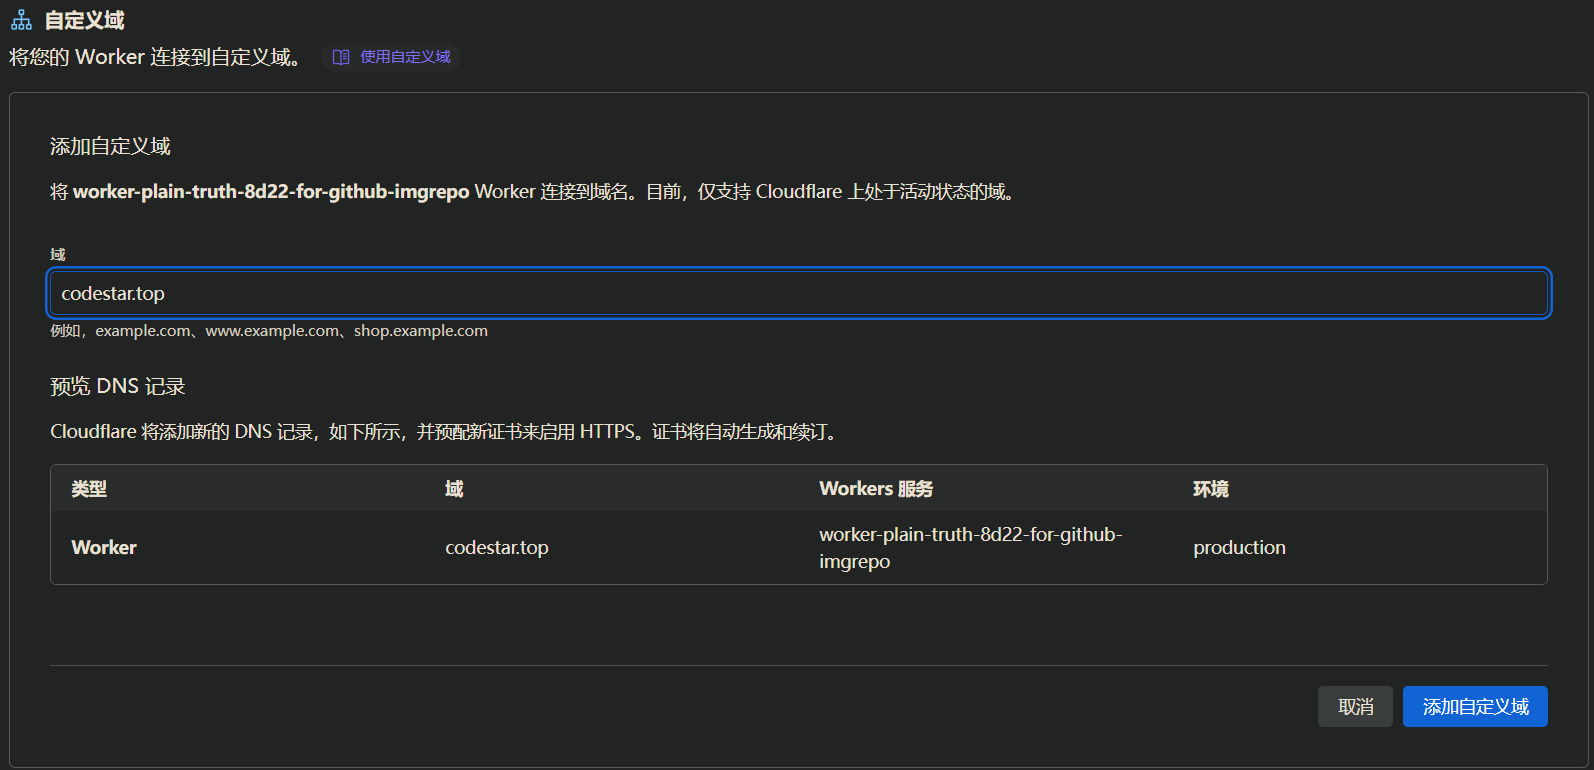
添加自定义域:(这里的域必须要提前加入到cloudflare中才允许添加)

image-20231022181508512

image-20231022190017756

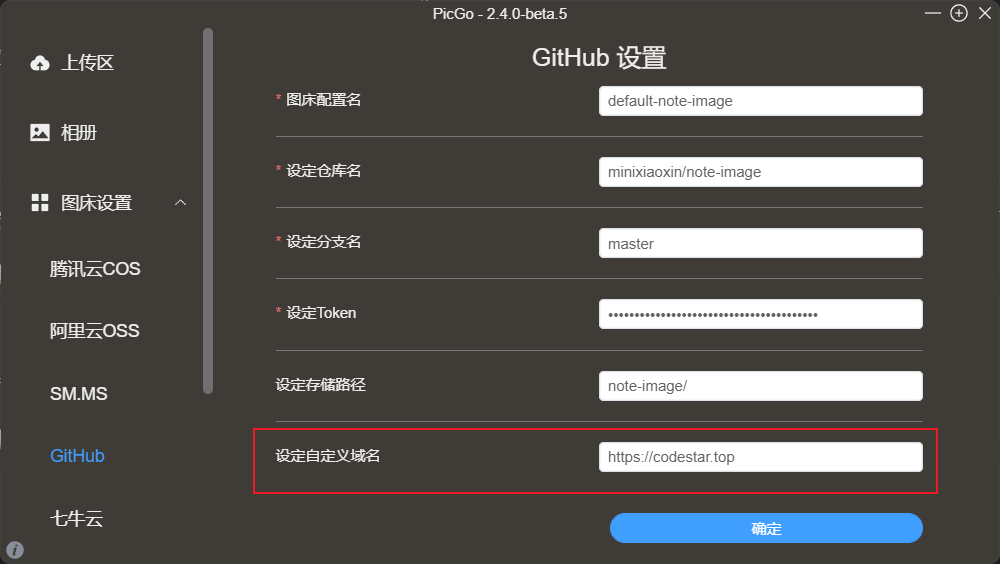
之后在PicGo中配置域名,生效配置(域名DNS生效之后此配置才会生效):

image-20231022212059643

之后就可以正常上传图片,并通过Cloudflare加速访问了:

image-20231022212016931

5、参考

https://ji2xpro.github.io/73d224e9/

https://sarakale.top/blog/posts/3a730d01

https://james-blog.top/posts/21.html

https://monkeywie.cn/2020/08/20/fast-github-page-with-cloudflare/

Windows中配置PigGo图床及CDN加速
http://blog.codestar.top/website/windows-piggo-picture-cdn.html
作者
MINI小新
发布于
2025年7月13日
更新于
2025年7月13日
许可协议